Tuesday, November 30, 2021

Stampin' Up! Sweet Stockings Gift Card Holder

Good Tuesday morning, peeps! I had so much fun making my gift card holder for today. Let me show you...


My card base is Crumb Cake with mats of Cherry Cobbler. I used the Sweet Stockings 12 x 12 Designer Series Pack. I learned how to create this by watching Leticia Hernandez., DIY Diva on FB. I forgot to round off my corners.

Monday, November 29, 2021

Stampin' Up! Inspired Thoughts Thank You Card

Welcome to Monday Makeover Madness. Today I CASE'd my friend and upline, Mary Deatherage. You can see her card here. Here's mine...


My card base is Fresh Freesia Cardstock. I cut two panels of Very Vanilla (one for the front and one for the inner liner) and adhered them to the card front and the inside. Then I cut two pieces of the Wood Grain pattern from the Heart & Home Designer Series Paper (available in the January-June 2022 Mini Catalog) and adhered them to the Very Vanilla on the front and inside. Now, that was a brave thing to do, adhering the inside before I stamped on it. You might want to rethink that! Fortunately, my stamping came out perfectly, which you'll see in a moment.

Next I cut the Very Vanilla mats for two different patterns of DSP from the retired Floral Romance Specialty DSP and for the "window". Measurements for everything are listed below.

For the "window" I cut a different wood grain pattern from the upcoming Heart & Home DSP with the retired Stitched Shapes Framelits Dies (the 2 5/8" and the 2 1/8" ones). Then I adhered the window strips, from that same pattern, that I had cut with my Stampin' Trimmer. I adhered a piece of vellum from the retired Floral Romance Specialty DSP behind the window and strips. I adhered that piece to another piece of Very Vanilla cardstock and adhered that to the front with Stampin' Dimensionals.

I stamped the sentiment from the Inspired Thoughts Stamp Set on a strip of DSP with Mossy Meadow ink. I adhered the left side with liquid glue and the right side with Dimensionals.

In my stash was a button that matched the card base so I adhered that with a glue dot, made a double loop Linen Thread bow and attached that with a glue dot. Outside, fini! Now on to the inside...


I stamped the sentiment from Inspired Thoughts and the fern leaf from the Daisy Lane Stamp Set using Mossy Meadow ink.

Measurements:

Card Base: 5 1/2" x 8 1/2", scored and folded at 4 1/4"

Very Vanilla Cardstock:

  • 3 7/8" x 5 1/8" (2) for front and inner liner
  • 2 3/4" square mat behind window
  • 1 1/8" x 3 5/8" mat behind left DSP panel
  • 3 1/2" x 3 5/8" mat behind right DSP panel
Floral Romance Specialty DSP:
  • 1" x 3 1/2" left panel
  • 3 3/8" x 3 1/2" right panel
  • 2 1/2" square behind window
Heart & Home DSP:
  • 3 3/4" x 5" (2) front and inner liner
  • 2 5/8" Stitched Shapes square
  • 1/8" x 2 1/2" strips (4)
  • 1/2" x 2 1/2" sentiment
I'm playing today at Craftyhazelnut's Patterned Paper November 2021 and Just Us Girls #612. This is their photo inspiration. I just love that farm sink with the window behind it. I had no sink to put in front of my window...lol. 

Thank you for stopping by today.

Friday, November 26, 2021

Stampin' Up! Daisy Lane Thank You Card

TGIF, peeps! Are you still in a turkey coma? Believe it or not, I did not overeat yesterday and I even skipped dessert!

My card today uses the Daisy Lane Stamp Set, Dragonfly Garden Stamp Set and Best Year Stamp Set. I've also used the Designer Series Paper that will be in the Sale-A-Bration promotion in January. It's called Daffodil Afternoon. You're going to love it! However, because I am a PEO and their signature flower is a daisy, I chose to go that route. Take a look see...


Because it is a fun fold, I am entering it the Creative Creases #20 Challenge.

 
If you have any questions, please drop me an email (under my profile) and I'll answer you asap.

Measurements:

Basic Black Cardstock: 8 1/2" x 5 1/2", scored and folded at 2 3/4" and 7"
Pear Pizzazz Cardstock for Mats: 2 3/8" x 5 3/8" and 1 3/8" x 5 3/8" (2); 2 1/8" x 4 3/8" for art panel
DSP for front left: 2 1/2" x 5 1/4"; for front right and inside: 1 1/4" x 5 1/4" (2)
Basic White Inner Liner: 4" x 5 1/4"; art panel 2" x 4 1/4"

Thank you for stopping by today and have a great weekend. I won't be posting again until Monday. See you then!


Thursday, November 25, 2021

Stampin' Up! Beauty of Tomorrow for the Happy Inkin' Thursday Blog Hop

Happy Thanksgiving to my US readers and welcome all to the Happy Inkin' Thursday Blog Hop. This week we have a sketch challenge.

Here's what I created for it...

and here is the sketch...
My card base is Soft Succulent Cardstock. I cut a piece of Ever Eden DSP of one pattern (3 1/4" x 5 3/8") and flipped the pattern over and cut a 3/4" x 5 3/8" strip. I adhered it to the base with liquid glue. No Dimensionals were harmed in the making of this card!

I stamped the sentiment from the Beauty of Tomorrow Stamp Set in Soft Succulent on a piece of Basic White. I used a die from the Eden Dies set to cut it out. I kept the inner portion and saved the white frame for another day. I sponged it with Soft Succulent ink and went heavier in two corners so my Brushed Brass Butterflies would show up better. (Dec. 1 they will be available to Demonstrators who didn't attend OnStage and to customers on January 3, 2022.) Needless to say, I will be ordering more of them! Then I recut the frame out of Gold Foil and glued it to the sentiment part. I added three more butterflies to the front of the card.

For the inside...

I adhered a mat of Soft Succulent (4 1/8" x 5 3/8") to the base. On a 4" x 5 1/4" panel of Basic White, I stamped another sentiment from the Beauty of Tomorrow Stamp Set using Soft Succulent ink. I stamped the flower from that set third generation. To finish the inside, I adhered a strip of DSP (1/2" x 5 1/4"). 

Thanks for taking time out of your day to hop with us. Clicking on the "next" button will take you to Akiko. Clicking on the names listed below will take you directly to team members and their projects.


Amy Koenders
Mary Deatherage
Sue Prather
Karen Finkle - You are here!
Akiko Sudano
Karen Ksenzakovic
Tara Carpenter
Terry Lynn Bright

"Enter into His gates with thanksgiving, and into His courts with praise. Be thankful to Him, and bless His name."
Psalm 100:4

Wednesday, November 24, 2021

Stampin' Up! Sailing Home Masculine Encouragement Card

Mid week again, folks! Seriously, it's November 24 already? Hope you have a fun day planned tomorrow. I am thankful for so many things and I'm sure you are too. There's a lot to be said about gratitude. It sure beats grumbling!!

My card today is for the gentleman who lost his wife in September. I bumped into him Monday and he thanked me profusely for the card I sent him, along with my thoughts. So, I felt led to create this card for him using the Sailing Home Stamp Set.


I was inspired by three challenges: Try Stampin' On Tuesday: Challenge 533 who is partnering with Double Trouble Paper Crafting 97B

Thing 1:  Trouble Maker 
says, "My fur baby, Cleo, and I love to play Peek-a-boo,  I see you!  Click on this short video for some cute ideas to create a peek-a-boo theme and/or use our Design Team projects as inspiration.  This can be anything from a clean and simple card to a fun fold.   Let's see your interpretation of a Peek-a-Boo project.  

Our partner for this challenge has a great sketch you may  want to use (optional) for your Peek-a-boo project. Consider the circle in the sketch as a window... or use any shape you wish. You may also change the orientation of the sketch by rotating the sketch or using its mirror image. Surprise us with your Peek-a-boo!
 

Thing 3:  Twisted Sister 
says, "I'm still Tangled up in T's from the last challenge. So my Tricky Twist is to include Twine or any Type of ribbon, string, cord, or Tape on your project."  

This is an OPTIONAL TWIST but you will be awarded an additional chance in Double Trouble's random draw if you include this twist in your project. 


Thing 2:  Double Dare 
says, "Peek-A-Boo!"  I see you have met Trouble Maker's Peek-a-Boo theme and have used the TSOT Sketch #533 above, you can Enter here Try Stampin' on Tuesday Sketch #533,  I chose to change the orientation of the sketch and used a square for my Peek-a-Boo theme." 

Please note that Try Stampin' on Tuesday starts on Tuesday, November 16th. If you post your project at Double Trouble on Monday, the 15th, you are still eligible to enter your project. We are permitted to backlink for that Monday only... so be sure to visit again on Tuesday so you can post your card to the TSOT Challenge using the link provided above. 


So, my card is a Peek A Boo Slider Fun Fold and I followed the instructions by Lisa Curcio.

Here's the inside...

and what it looks like from above...

The Designer Series Paper is the retired Come Sail Away and the ship's wheel is a retired Sail Away Trinket. The Baker's Twine is current and is shown below.

For my next attempt, I'll put a frame around the windows and dress it up a little more but for a man, I wanted to keep it low key.

Thank you for stopping by today and if you have any questions, let me know in an email. You can find the email link under my profile.

"Rejoice always, pray without ceasing, in everything give thanks; for this is the will of God in Christ Jesus for you."
1 Thessalonians 5:16-18

Product List

Links by TheseAreMyStamps.com

Tuesday, November 23, 2021

Stampin' Up! Pretty Kitty Birthday Card

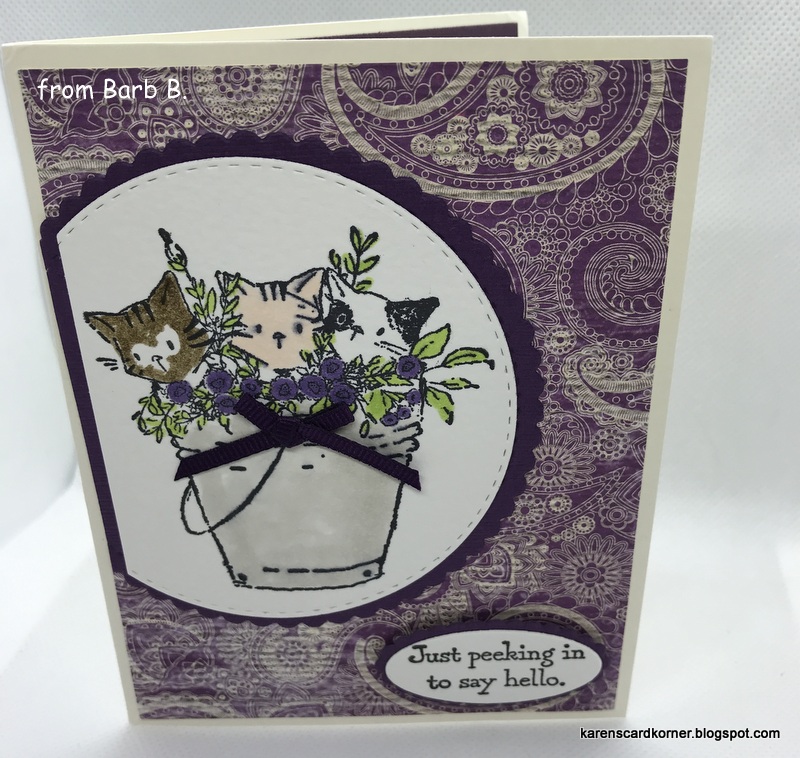
Good Tuesday morning! I did not make a card for today but have three more cards I received during my birthday month. In the past, I have celebrated my birthday once a week by going out to eat. Not this year, however. I'm just celebrating with cards. The first card uses the sentiment from the retired Pretty Kitty Stamp Set. It makes me want to dig that set out and use it again! The second uses a die from the Sea Life Dies set. The third is a photograph that reminds me of the retired Delightful Daisy DSP.


Thank you for stopping by today and tomorrow I'll have a card for you that I'll be entering in a couple of challenges.

Monday, November 22, 2021

Stampin' Up! Word Wishes Thanksgiving Card

Good Monday Morning Makeover, peeps! I'm still going with a Thanksgiving theme. Well, because...you know why! I'm so glad I don't have to cook for Thursday! What are you doing that day?

This is how my remake looks and because there is no stamping, I'm entering it in the UnstampaBelles Challenge #117: November: Colour my World. I love all the colors represented in the truck.


This is my original from October 23...


I can't decide which one I like better. The one today uses Pattern Party Designer Series Paper, a fussy cut of the truck from the napkin, and words from the Word Wishes Dies. My card base is Crushed Curry Cardstock.

I'm also entering my card at Craftyhazelnut's Patterned Paper November 2021 and Use Your Stuff #436 Thanksgiving/Grateful.

Thank you for stopping by today. I hope you enjoyed my remake.

A spirit of thankfulness is one of the most distinctive marks of a Christian whose heart is attuned the Lord.
Billy Graham


Sunday, November 21, 2021

Stampin' Up! Mini Curvy Keepsake Thanksgiving Treat Boxes

Good Sunday morning, peeps! Can you believe Thanksgiving is Thursday? I'll be going to my Godson's for Thanksgiving and decided to make these table favors for each person. The boxes are so quick and easy if you have the Mini Curvy Keepsake Box Dies, which are retired. The Painted Autumn Designer Series Paper is retired as well. (I have an unopened pack if anyone is looking for it!)


The design for my tags came from my upline, Amy Koenders. I printed out the sentiments on my computer and cut them with another die from the Mini Curvy Keepsakes. Then I used that same die to cut the bottom portion of DSP and adhered it to the main tag. I'm glad I kept the dies and paper! The baker's twine is from the Dollar Store that I purchased in 2011! Ten years ago and it's the first time I've used it...lol. I dug deep into the stash for this project! The Dove Sea Salt Caramel candies, however, are new!!

I'm entering my project at TGIF Challenge 343.

and at Craftyhazelnut's Patterned Paper November 2021.

Thank you for stopping by today and tomorrow I might just have a makeover!

"Oh give thanks to the LORD, for He is good; for His steadfast love endures forever!"
1 CHRONICLES 16:34 (ESV)

(i took the liberty of using Jackie Bolhuis' photo so I didn't have to open the pack I have left.)
Mini Curvy Keepsake Dies (retired)


Saturday, November 20, 2021

Stampin' Up! Happy Holly-Days Hanukkah Fun Fold Card

Well, Karen Ksenzakovic...if you are reading this, you know I finally CASE'd your card! It took me awhile, but with your wonderful video it worked out pretty good!! For my readers who don't know, Karen is one of my teammates who creates fun folds for Fridays, which she videos on Wednesday. 

Without further ado, here's my take!


My card base is Cherry Cobbler Cardstock with a mat of Poppy Parade Cardstock. I used another win from 12 Months of Christmas Metallic Digital Paper. I'm in love! The sentiment is from the Happy Holly-Days Stamp Set. I cut it out with a die from the Tasteful Labels Dies. I adhered a piece of Double Stitched Real Red Satin Ribbon underneath.

For the inside...


I used the Happy Holly-Days for the big sentiment, punched it out with the Label Me Fancy Punch and sponged it with Poppy Parade ink. 

For the bottom fun fold,  I used the menorah from the retired Seasonal Lantern Stamp Set.  For the words, I used the A Wish for Everything Stamp Set.


Above is how it looks from above!

Since I do not do videos, I've provided a link here for you to see how it was created. Thank you, TOK (the other Karen) for such great instructions and all the math you did!

I'm entering my card in these challenges:

Creative Creases #19 - Anything Goes with a Fun Fold

12 Months of Christmas #83 with the optional twist of: Red & White

Craftyhazelnut's Christmas Challenge #569

Thank you for stopping by today.


Friday, November 19, 2021

Stampin' Up! Words of Cheer Christmas Card

TGIF, peeps! My card today is all Stampin' Up! with the exception of the metallic digital paper I won at 12 Months of Christmas on Challenge #81. I'm playing again in their #83 challenge but without the red and white optional twist. However, stay tuned for the optional twist tomorrow! Thank you, Lisa Decosse for your wonderful work of art!


My card is a CASE of my teammate, Jaimie B. The cardstock for my slimline base is Gorgeous Grape. I made mats of Basic White for the digital paper. This is my first time with digital paper and this stamp set/dies so I'm playing at NBUS #32 - Never Before Used Schtuff. I have also used Fresh Freesia cardstock and the retired Winter Snow EF. Are you wondering about a purple Christmas Card? It's for a specific person who loves purple (other than moi!).

The "Cheer" is cut with the Christmas Cheer Dies as are the three little "poinsettias" and leaves (Crumb Cake Cardstock).

For the inside sentiment, I used a stamp from the Words of Cheer Stamp Set and a stamp from A Wish For Everything Stamp Set. I also used the Holly Border Punch.


Because this is fun-fold card, I'm entering it at Creative Creases #19; also at Craftyhazelnut's Patterned Paper November 2021 and Craftyhazelnut's Christmas Challenge.

I had a lot of fun creating this card. I'm not going into the details of how I put it together, but here are the measurements if you want to try your hand at making it:

Card Base: 7 1/2" x 8 1/2"; score and fold at 1 3/4", 5 1/4" on 7 1/2" side

Panel 1: Basic White 2 1/8" x 8 3/8"; DSP 2" x 8 1/4"

Panel 2: Basic White 1 5/8" x 8 3/8"; DSP 1 1/2" x 8 1/4"

Mat for art piece: 2 1/4" x 5 1/2"

Basic White Embossed Panel: 2 1/8" x 5 3/8"

Card Stock to fit word die, letter dies, leaves and stars, which sub as pointsettias!

Inner Liner: 3 1/4" x 8 1/4"

I hope you enjoyed my project today and thanks for stopping by. Have a great weekend. 

Partial Product List

Links by TheseAreMyStamps.com

Pammie's Inky Pinkies Challenge #2411

Welcome to another PIP Challenge . Here is what I created for it... I just love the background digital from our   awesome sponsor ... This w...