Wednesday, August 19, 2020

Stampin' Up! Winter Woods Sympathy Card

Mid-week greetings and thanks for stopping by to view my card. I used the Winter Woods Stamp Set to create it.

WINTER WOODS CLING STAMP SET (EN)

On a piece of Very Vanilla card stock (5" x 3 3/4") I stamped the trees from Winter Woods and also used a stamp from the retired Sheltering Tree to create grassy mounds. The sentiment is from Itty Bitty Greetings. I ran it through my embossing machine with the Subtles 3D EF.

ITTY BITTY GREETINGS CLING STAMP SET (EN)

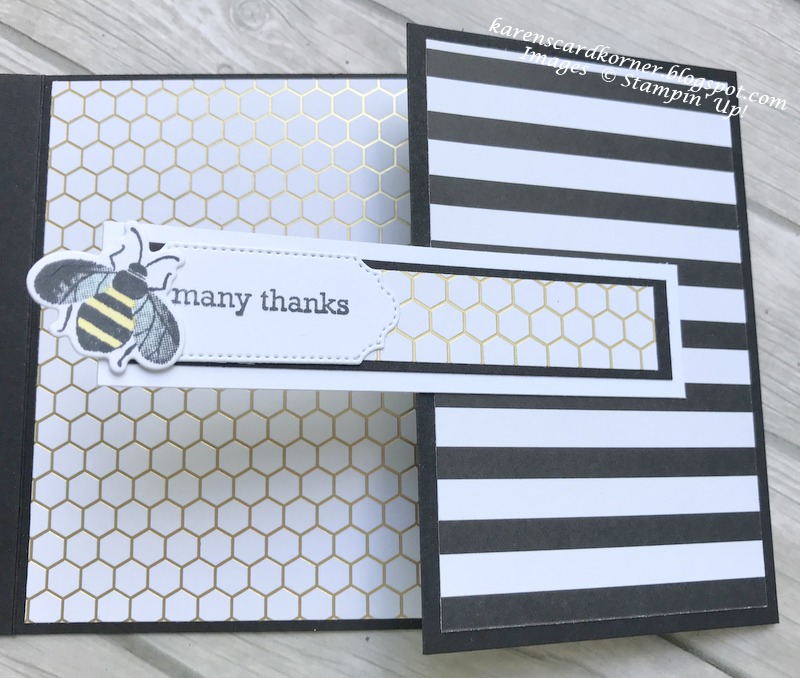
I attached the art panel with Stampin' Dimensionals to a Very Vanilla card base that was also dry embossed with the Subtles folder.


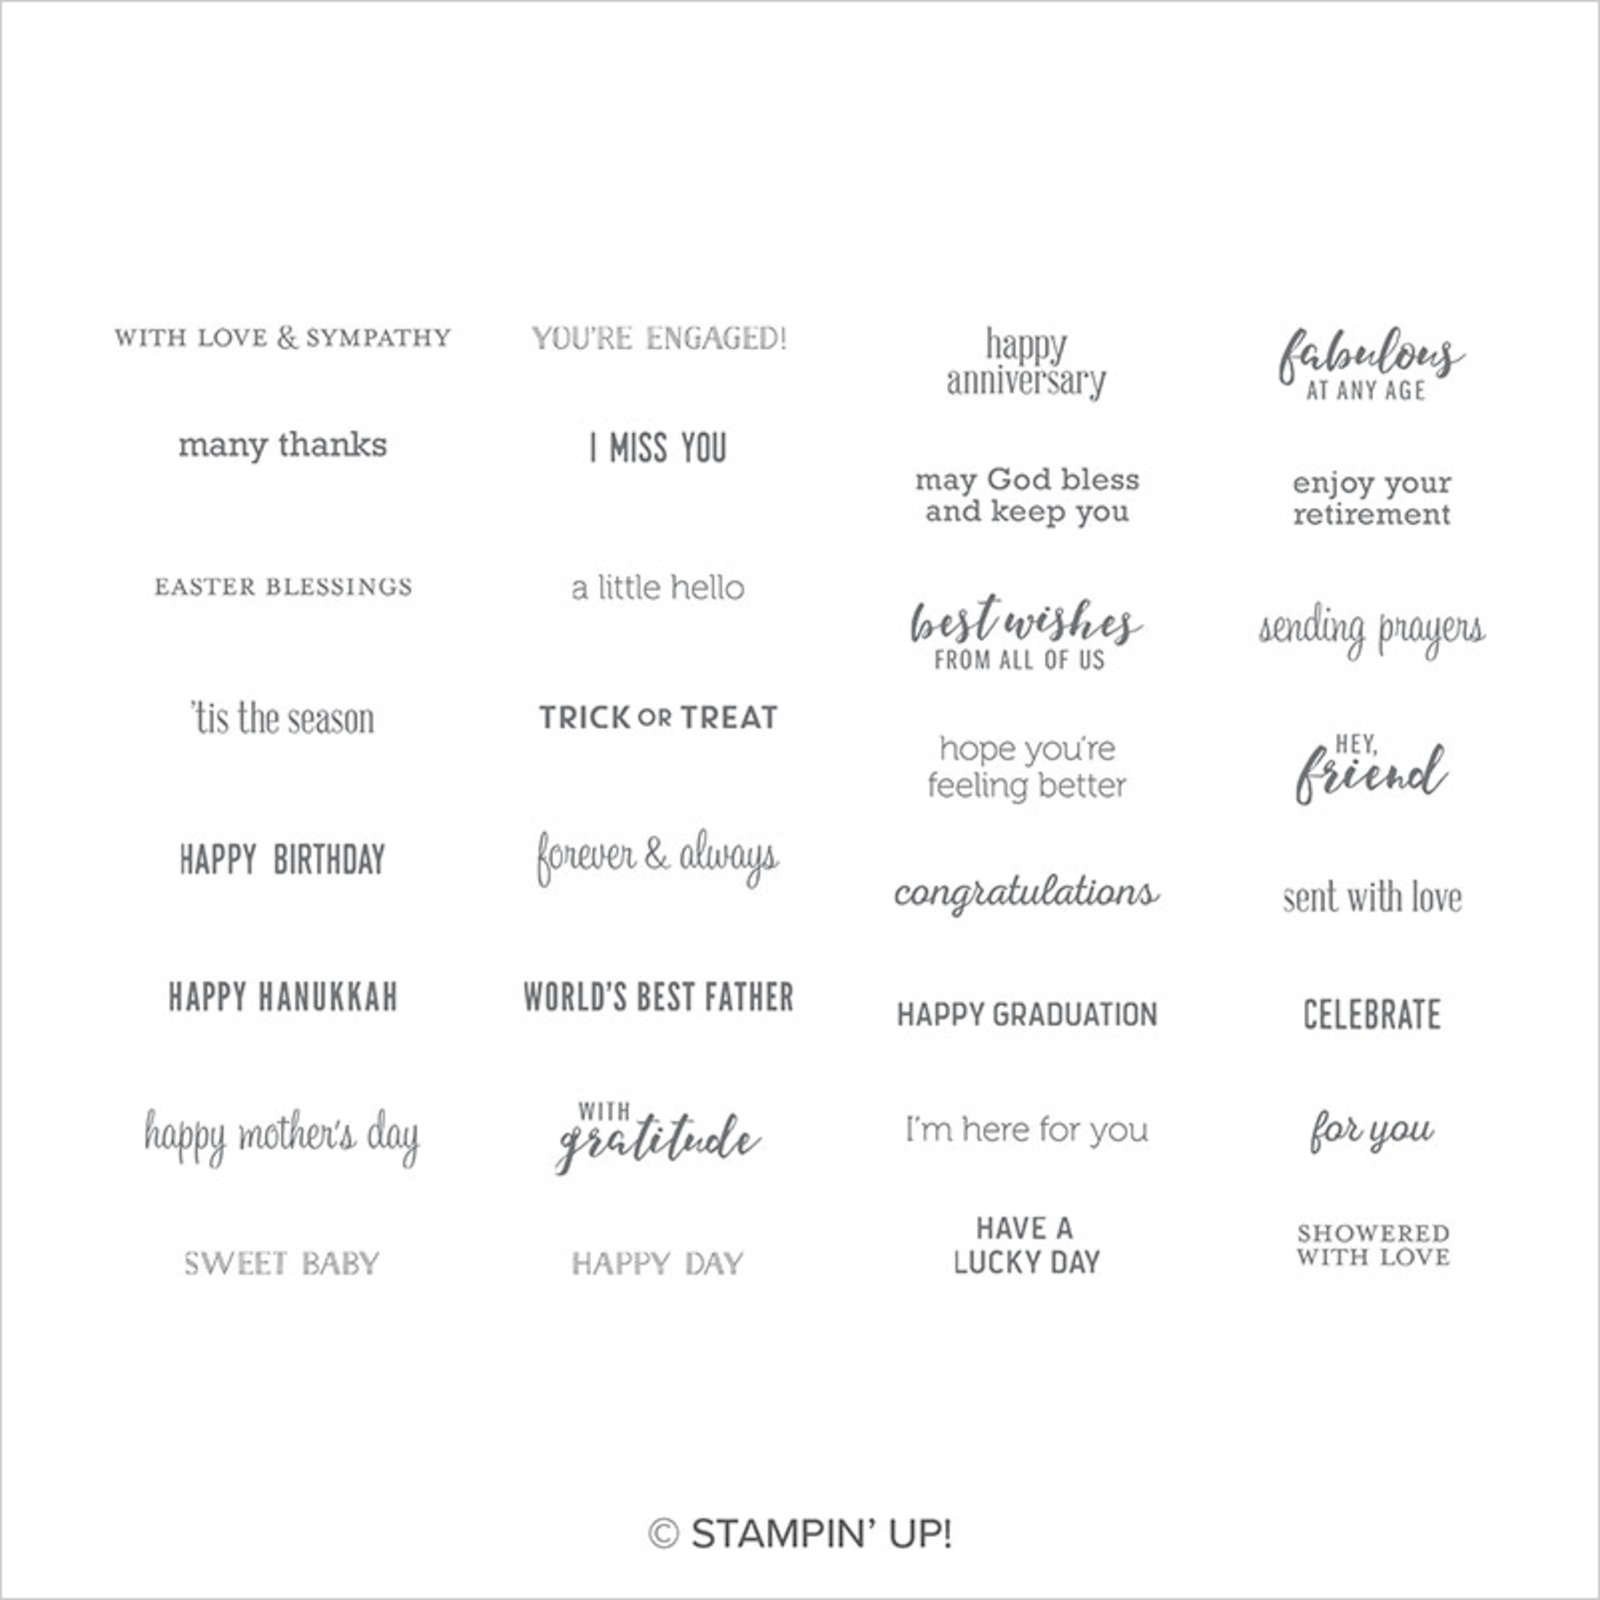
For the inside, I used two of the dies from Stitched So Sweetly and a sentiment I got off the internet.

STITCHED SO SWEETLY DIES

This card was purchased by one of my clients for a man so I'm entering it in the Watercooler Wednesday: WWC285 Karen's Challenge: Anything Goes With a Masculine Twist


If you have any questions, be sure to comment and I'll reply as quickly as I can. I hope you'll be back tomorrow for our weekly Happy Inkin' Thursday Blog Hop.


Tuesday, August 18, 2020

Stampin' Up! Old World Memories & More Birthday Card

 Happy Tuesday, peeps! Today is going to be short and sweet because my son and I are making 5 kinds of Jerky. Clean up is awful but it's offset by the delicious chew!

I made this awhile ago but sold it and couldn't post until it was received. I need to start writing down measurements as I create my cards!

I used the Old World Memories & More Card pack once again...


I ran out of Gold Foil so the globe and stand are cut from Brass Foil with the World Map Dies. The globe is adhered with mini Dimensionals and the stand with liquid glue.

My background is from the World of Good Specialty Designer Series Paper and it's adhered to a card base from Close to My Heart. There is no stamping on the front so I am entering it at UnstampaBelles Challenge #103 Good News and Create Your Own Background

I went over the "You" with a gold pen to emphasize it. It's cut from one of the cards in the pack and adhered to a gold foil frame. The good news is we can still make the world a better place even during the pandemic. Kudos to all who do that!

The map is from the Memories & More Pack and the sentiment is from Itty Bitty Birthdays. It's mounted on gold foil but it looks like copper foil in the photo.

I'm also entering my card at Shopping Our Stash  Challenge #427 Pile It On.

Thank you for stopping by today and stay safe.

Monday, August 17, 2020

Stampin' Up! Honey Bee Thank You Card

Good Monday morning, peeps. Remember this card made with the retired Honey Bee Stamp Set, matching dies and retired Golden Honey Designer Series Paper?

Well, here's my prototype and learning experience...

To help you get you started:

Card base : Cut at 4 ¼” x 11”, score at 2 ¾” from each end; burnish each panel

2 DSP: 2 1/2” x 4”

Strips: 3 Whisper White 1” x 4”

3 Black: 3/4” x 3 3/4”

3 DSP: 1/2” x 3 1/2”

Layer and adhere pieces together with liquid glue.

Stamp the hive on scrap Whisper White in Memento Tuxedo Black ink; likewise the flower. Color the flower with Blends.

Die cut the hive and flower.

I had to add the die cut scalloped circle because I didn't do a dry fit. The text which is highlighted is very critical!

Dry fit: O
n the closed card front take the three strips and place them evenly apart but close enough to be sure the hive spans all three strips.  Once you are sure of that, you can begin the gluing process. You can see the resulting oopsie of no dry fit! The bottom of the hive did not touch the bottom strip! The glue had already set on the strips so there was no going back!


Glue the left side of the first strip to the left panel.

Glue the right side of the second strip to the right panel.

Glue the left side of the third strip to the left panel.

Use washi tape or Post It Note Tape to temporarily secure the hive on the right side, spanning all three strips.

Flip the card open and lightly mark the hive so you know where to put the glue.

Flip the card back over, remove the washi tape, and put glue on the hive where the pencil lines are. It should only be glued to the two outer strips. 

Stamp the sentiment from Itty Bitty Greetings on scrap Whisper White and die cut with a die from the Ornate Frames Dies. Adhere it with liquid glue.

Glue the small bee to the sentiment and the flower to the hive.

Now for the inside...

Cut a piece of DSP 5 1/4" x 4" and adhere it to the base.

Cut a piece of Whisper White 5" x 3 3/4" and stamp it with bees and thank you from the Honey Bee Stamp Set.

I'm playing today at Double Trouble #64 Brighten Someone's Day but only with Trouble Maker Thing 1.

Challenge #64 "Let's Brighten the Day" Starts Friday, Aug 14th

I'm  also playing at Pammie's Inky Pinkies #2033.

If you have any questions, feel free to ask and I will try to answer. Thank you for stopping by today. 

Sunday, August 16, 2020

Stampin' Up! Campology Happiest Birthday

Good Sunday morning, peeps. The weekend certainly does fly by even when retired!

Camping is such summer fun and that's the challenge at Allsorts Week 585/6.

I used the Campology Stamp Set and Happiest Birthday Stamp Set to create my card. It can be either masculine or feminine.

My card base is So Saffron Card Stock, 5 1/2" x 8 1/2", scored at 4 1/4", on which I stamped the trees and sentiment from the Campology Stamp Set. I used Mossy Meadow ink for that. The trees are stamped off twice.

The patterned paper is from ScrapBerry's Forest 6 x 6 Paper Collection. I'm playing at Craftyhazelnut's Patterned Paper Challenge today.

I cut a 2 1/2" strip and adhered it with liquid glue. I cut the campfire with a die from Stitched Shapes Dies. It was right on the edge of the paper so I had to fill in the other side of the square with a piece like the strip. I sponged the right side piece trying to achieve the background of the fire but the difference is still noticeable. I used this design because I was going to enter it in a challenge. However, I didn't realize the challenge had ended two  hours before I finished my card! I might deconstruct it to add twine around the seam. Again, I'm looking for advice so if you have time, let me know your thoughts in a comment. Thank you in advance!

The inside is clean and simple.

I used the coffee pot stamp from Campology, stamped in Crumb Cake. The sentiments from Happiest Birthday are stamped in Early Espresso ink.

Every once in awhile, I like to read a young adult or children's book. My favorite from long ago is The Secret Garden. I think I now have a new favorite, Our Great Big Backyard. My husband and I always wanted to travel in the RV to all the National Parks but that did not come to pass. However, we did make it to four. So, I'm in the process of traveling to more with the help of Laura Bush and Jenna Bush Hager's book. The cover of the book has a campfire on it thus the inspiration for my card. I'm entering it in the International Art & Soul Challenge #90

Last, but not least, I'm playing again at Dragonfly Dreams monthly Anything Goes Challenge.

I will admit I don't like camping in a tent. When we had the RV, we called it "glamping" and we always had a campfire. I kept my blog on our travels and every once in awhile I re-read my first attempt at blogging.

Thank you for stopping by today and I hope you enjoyed my card. 


Saturday, August 15, 2020

Stampin' Up! Whiskey Business Masculine Birthday Card

When you see my card, you might not think it's masculine, but it's for this birthday boy. He's one of the bartenders at the Celtic Ray.

I asked his permission to take the pic and told him I'd be making a card but he didn't know it would be for him. Here it is...

Needless to say I had fun creating it with the Buffalo Check Stamp Set and Whiskey Business Stamp Set!

My card base is Smoky Slate with a mat of Petal Pink. I drew the lines with my Basic Gray Stamp N Writer Marker (my ruler slipped in one place...ugh!) and sponged the plaid with Petal Pink ink. I cut a strip of DSP from the In Good Taste DSP and adhered it at the bottom.

The whiskey bottle and glass had previously been made when I created this card. Just click on the link to see the details.

The inside is stamped with a sentiment from the Happiest of Birthdays Stamp Set.


I used my Petal Pink Stamp N Write marker for part of it and my Basic Gray marker for the rest. The glass is Smoky Slate stamped off once and the lemon peel is Crushed Curry, which I wish I had stamped off once!

Today I'm playing at:

Dragonfly Dreams: Anything Goes Challenge 

A Perfect Time to Craft Open Challenge #8 ATG

CardzTV ATG #121

Thank you for stopping by and I hope your weekend is going smoothly.


Friday, August 14, 2020

Stampin' Up! Sympathy Card

Good Friday morning, peeps. Hope you have a fun weekend planned. I'll be in the craft room trying to finish card orders for Monday. My card today is another one for the sympathy card order.


My card base is Smoky Slate 4 1/4" x 5 1/2". I cut a mat 4" x 5 1/4" and ran it through my embossing machine. The DSP I used is Springtime Foils, which is retired. I have so much of it left and it's all cut up in various sizes when I was on the #loveitchopit band wagon! If you would like more information on measurements or anything else, just let me know in a comment.

All who follow me know that I love monochrome cards so I'll be entering this in the Stinkin' Inkers Challenge.

My design was inspired by the Atlantic Hearts Sketch Challenge.

The Alphabet Challenge Blog has "J is for jewels/jewellry" for its challenge. I do only have one jewel on my card, but it's worth its weight in gold ;-)

For the inside, I used another retired SU set, Thoughts and Prayers.


Products I used are listed below. Thank you for stopping by today.

Project Details—All Products SU! Unless Otherwise Specified
Stamps Rose Wonder, Thoughts and Prayers (retired)
Card stock & Papers     Smoky Slate, Basic Gray, Whisper White Thick, DSP retired
 Ink Basic Gray
Accessories Silver Metallic Edged Ribbon, Gilded Gems, Silver Emboss Powder
Tools     Greenery Embossing Folder, Heat Tool, Triple Banner Punch

Thursday, August 13, 2020

Stampin' Up! Rooted in Nature Sympathy Card for the Happy Inkin' Thursday Blog Hop


Welcome to the Happy Inkin' Thursday blog hop. You're in for a treat if you have never visited before. It's a weekly challenge and this week we have a theme challenge. I can't wait to see what the other team members created. Hop along with us at the bottom of my post.

Image may contain: text that says 'Happy Inkin Thursday Blog Hop August 13 Theme Challenge Leaves or Trees'


I used the Rooted in Nature Stamp Set to create my card today. My team mate, Karen K., sent me a similar card almost two years ago when my husband passed away in November. I just HAD to CASE it!

I used Mint Macaron card stock for my base and stamped the leaves tone-on-tone. I cut a piece of Whisper White 2" x 5 1/2" and stamped the leaves in Cinnamon Cider, Bumblebee and Just Jade. I used Bumblebee ink and the splotch stamp from the Beauty Abounds Stamp Set to break up the white spaces.

Using the Nature's Roots dies, I cut out the tree (stamped in Just Jade and Soft Suede) and adhered it to a Soft Sea Foam mat that I cut with the Stitched Rectangles dies. I adhered the tree with Dimensionals. Then I stamped leaves in Bumblebee, Cinnamon Cider and Just Jade and cut them out with the Nature's Roots dies. I adhered them with Dimensionals and created a bow that I adhered with a glue dot.


The sentiment is from the Path of Petals Stamp Set. The leaf branch is from Rooted in Nature.


I hope you enjoyed my card today and thank you for joining the hop. Clicking on the "next" button will take you to Eva Dobilas. Clicking on the names below will take you directly to the other team members and their projects.


Amy Koenders

Mary Deatherage

Kristi Gray

Jaimie Babarczy

Sue Prather

Karen Finkle - you are here! Partial Product List

Links by TheseAreMyStamps.com

Wednesday, August 12, 2020

Honey Bee Encouragement Card

 Mid-week already and I don't have half my card orders ready for Monday! Today and tomorrow have to be productive days!! This card took awhile...

Once again, Wendy Cranford was my inspiration. The Honey Bee Stamp Set is retired, as is the Designer Series Specialty Paper. But, if you have the product on hand, it's a fun card to make.


The bees can be found on Amazon...just search for Jolee's Boutique Dimensional Stickers, Bees.

For the inside, you will need DSP - 5 1/4" x 4"; Whisper White 5" x 3 3/4"; scrap of gold foil


For the outside: DSP 2 1/2" x 4" (2) for panels; 3 3/4" x 3/4" for cross strip

Gold Foil: 3 7/8" x 7/8" for underneath DSP cross strip; 2 5/8" x 4 1/8" mats for panels

Basic Black: 4 1/8" x 1" for cross strip mat

Basic Black Card Base: 11" x 4 1/4", scored and folded at 2 3/4" from each end

The easiest part is cutting the pieces and adhering them! The most difficult was lining up the beehive and sentiment once the panels were cut with the Detailed Bee Dies. If you click on Wendy's name above, you will see how she did this. If you don't have time, what I did was lay the hive die on the front panels one side at a time, secured it with Post It Note tape and cut one side at a time. I had to run it through a number of times to cut through 3 layers. I used my Stamparatus to stamp the bee hive and sentiment but I didn't position the sentiment correctly so I tried to remedy that with the bees.

In order to keep the card latched, I put small pieces of Velcro at the right end of the cross strip.

I'm playing today at 2 Crafty Critter Crazies #41 and The Sisterhood of Crafters Masculine.

Let me know if you give this a try and thanks for stopping by today.


Tuesday, August 11, 2020

Stampin' Up! Butterfly Gala Sympathy Card

I have an order for a bunch of sympathy cards this week so you'll be seeing a variety. Fortunately, I have not needed any for myself.

Joanne at The Paper Players PP503 has quite an interesting color challenge this week...

and here is what I created for it...


I used the Butterfly Gala Stamp Set for my butterflies. I stamped the butterflies on Whisper White card stock using Memento Tuxedo Black Ink. I had sponged them with Mango Melody ink because I don't have the Mango Melody Blends. I punched them out with the Butterfly Duet Punch. BUT I didn't really care for the large one so I stamped another and colored it with my Dark Pool Party Blends. I kept the small Mango Melody sponged butterfly and added a Light Pool Party colored small one. The small Mango one is adhered with a mini Dimensional, the small Pool Party one is adhered with liquid glue. The large one is adhered over the Mango Melody one with liquid glue. It gave it a little depth but not as much as using  Dimensionals. Now I'm trying to decide if I should add one more Metallic Pearl. I'd like your input if you have time.

Update: It was suggested that I add another pearl so I did!


I cut out a Melon Mambo Stitched Nested Label and a Whisper White Stitched Nested Label. I stamped the sentiment from the Itty Bitty Greetings Stamp Set. They are adhered together with liquid glue. I then  adhered them to the Night of Navy card base, which was embossed with the Tasteful Textile 3D Embossing Folder.

The inside is clean and simple...

The sentiment is stamped in Night of Navy ink and it's from the Path of Petals Stamp Set. The Mango Melody butterfly is from the Beauty Abounds Stamp Set.

I'm also playing at Retro Rubber RRCB141 where one of the requirements is to use a stamp that is older than a year. The stamps are from 2018.

RRCB 141

Thank you for stopping by today. I'm a little late posting because I had to get my hair cut. I really detest having to wear a mask for that but I'm thankful I have hair to cut!


Monday, August 10, 2020

Stampin' Up! Happiest of Birthdays Boho Indigo Product Medley

Good Monday Morning Makeover Madness! Awhile back I posted a sympathy card...this one...


and here it is made over...


Again, not only is this a CASE of my own card but one of Linda Bedinger's as well.

My card base is Whisper White Thick Card Stock. Adhered to that is a mat of Night of Navy .

On a  piece of Whisper White card stock, I stamped the sentiment from the retired Well Scripted in Night of Navy ink. At the bottom, in Garden Green ink 2nd generation, I stamped 2 sets of leaves from the Boho Indigo Stamp Set.

I adhered the Very Vanilla Gold Ribbon from the Boho Indigo Product Medley to a  snippet of DSP from the Medley. I used two of the palm fronds and two flowers from the Medley and adhered them with liquid glue and Dimensionals. Then I adhered the art panel to a  Night of Navy mat and adhered that to the card base.

On the inside I stamped the sentiment from Happiest of Birthdays in Night of Navy and Garden Green on a  piece of Whisper White. I adhered another strip of the same DSP pattern as on the front. I adhered the sentiment panel to a  mat of Night of Navy and adhered that to the card base. 

I love the fonts of the sentiments on the front as well as on the inside, don't you?
Base: 5 1/2" x 8 1/2", scored and folded at 4 1/4"
Mat: 5 1/4" x 4"
DSP: 1/2" x 5"
Art Panel: 5" x 3 3/4"
Ribbon: 6"

Inner Measurements:
Mat: 5 1/4" x 4"
DSP: 5" x 3/4"
Sentiment Panel: 5" x 3 3/4"

Thank you for stopping by today and as always, I appreciate the comments you leave.

Partial Product List

Links by TheseAreMyStamps.com

Sunday, August 9, 2020

Stampin' Up! Honey Bee Birthday Card

My inspiration today came from Wendy Cranford. I just love the retired Honey Bee Stamp Set, dies and Golden Honey Specialty Design Paper. Let me show you what I mean...
This is the front, obviously :-) and the next pic is with it partially open...

Next pic is...
you guessed it...the inside!

My card base is the new 2020-2022 In Color Bumblebee.

To help you get you started:

Card base : Cut at 4 ¼” x 11”, score at 2 ¾” from each end; burnish each panel

Mats for the two panels:   2 Black: 2 5/8” x 4 1/8”

                                        2 DSP: 2 1/2” x 4”

Strips:      3 Solid Color same as base: 1” x 4”

                3 Black: 3/4” x 3 3/4”

                3 DSP: 1/2” x 3 1/2”

Layer and adhere pieces together with liquid glue.

Dry fit:Take the three strips and place them evenly on the closed card front. Place the large bee on the right side to be sure it spans all three strips. Once you are sure of that, you can begin the gluing process.

Glue the left side of the first strip to the left panel.

Glue the right side of the second strip to the right panel.

Glue the left side of the third strip to the left panel.

Use washi tape or Post It Note Tape to temporarily secure the big bee on the right side, spanning all three strips.

Flip the card open and lightly mark its wings so you know where to put the glue.

Flip the card back over, remove the washi tape, and put glue on the wings to the lines and adhere to the two outer strips.

Glue the smaller bee to the left side of the center strip.

I had intended for this to go vertically rather than horizontally, but I had already cut out the sentiment and it didn't work in the vertical position. That's why the bees are going sideways! When Wendy made her card, she didn't use a sentiment on the front.

I'm entering three challenges today:

A Perfect Time to Craft #8

Gem of a Challenge Week #16 ATG

Seize the Birthday #196

I'd be delighted if you'd leave me a comment and/or click on the follow button. I'm trying to get to 100 followers by the end of August! If you need more information, just let me know but I'll need your email address so I can reply quickly. Thanks for stopping by.


Stampin' Up! Beautiful Gallery Thinking of You Fun Fold Friday

Yay, it's Friday...a fun fold Friday at that! Here's what I created for today. My design came from Mystery Stamping night with Dani...