Sunday, October 10, 2021

Stampin' Up! Beauty of Tomorrow Thank You Card

Good Sunday morning, peeps! I tried something new today and it wasn't a total success but it wasn't a total failure either. I designed my card with four challenges in mind, which I have listed at the end of my post. 


I began with a Basic White cardstock base 4 1/4" x 11", scored and folded at 5 1/2". I cut another piece of Basic White 4" x 5 1/4" and this is where the double emboss comes in. I inked up the raised side of the SU Ornate Floral 3D EF with VersaMark ink. I ran it through my embossing machine and then sprinkled the embossed panel with Copper Embossing Powder. I used my heat tool to set it.

Next I cut a 2" x 5 1/4' piece of Basic White. I masked off 1/2" on each side and sponged from top to bottom with Bumblebee ink, Pumpkin Pie ink and Poppy Parade ink. I used a stamp from the Beauty of Tomorrow Stamp Set, inking it up with Early Espresso for the branch image.

The "Thanks" is from the Sailing Home Stamp Set. I stamped it on Basic White with VersaMark, sprinkled it with Copper Embossing Powder and heat set it. I cut it out with a die from the Tasteful Labels Dies. I adhered it with Stampin' Dimensionals.

I embellished it with a Copper Foil butterfly I had in my stash and adhered it with glue dots. The inside is blank as it will be used for writing.

Allsorts Week 645 - Embellish It

Just Us Girls Trend Week #605


Sunday Stamps Weekly Challenge SSC627


I hope you have time to visit the challenges I've entered and give them some love!

Thank you for stopping by today and I hope you have a blessed day.


Saturday, October 9, 2021

Stampin' Up! Whimsical Trees Christmas Card

Good Saturday morning, peeps! Yesterday, I spent the afternoon trying to make a card, rather than going through files, and it was a big fail! It was SO BIG,I can't even tell you about it because you wouldn't even believe it was possible. I had already made the card once before but this time it had another dimension thrown into it. I won't give up though! You'll be the first to know when I succeed! Here's what I did end up making...

I was inspired by my teammate, Akiko Sudano, who created her card on World Card Making Day.

I stamped the tree from the Whimsical Trees Stamp Set in Evening Evergreen on Basic White cardstock and fussy cut it because I don't have the coordinating dies. I embossed a panel of Basic White with the Timeworn Type 3D Embossing Folder and adhered it to a Petal Pink mat. I adhered the layered embossed panel to a Pool Party card base with liquid glue.

I cut a panel of Whimsy and Wonder Specialty Designer Series Paper with my trimmer and adhered it to a silver foil mat from the Silver Foil Specialty Pack. I adhered the panel to the card front with liquid glue and adhered the tree to the card front with Stampin' Dimensionals. I cut a silver foil  star with a die from the Christmas Trimmings Dies and adhered it to the tree top with a glue dot. I decorated the tree with Holiday Rhinestone Basic Jewels.

I stamped the "Joy" sentiment from the Whimsical Trees Stamp Set with Evening Evergreen ink on a scrap of Soft Succulent cardstock and made the banner end with the Banners Pick A Punch. I tucked it under the tree, adhering it a glue dot and finished it with another Holiday rhinestone. I made a bow with Evening Evergreen Open Weave 3/8"  Ribbon and adhered it beneath the tree with a glue dot.

For the inside of the card..

I stamped the sentiment from the Whimsical Trees Stamp Set in Evening Evergreen on a panel of Basic White cardstock. I adhered a strip of the Whimsy & Wonder Specialty DSP to the bottom of the Basic White and adhered it to a panel of Petal Pink cardstock. I adhered that panel to the card base.

I'm entering my card in these challenges:
I hope I have enough pink showing for the pink challenges. My sister is a breast cancer survivor so October is near and dear to me.

Thank you for stopping by today and I hope you are having a fantastic weekend so far.

Measurements:
Pool Party Card Base  – 4-1/4″ x 11″, scored and folded at 5-1/2″
Petal Pink – 3-5/8″ x 4-7/8″ (front mat), 3-7/8″ x 5-1/8″ (inside mat)
Basic White – 2″ x 3-1/2″ (die cut tree)
Soft Succulent – 1-1/2″ x 3/4″  (sentiment banner)
Basic White – 3-1/2″ x 4-3/4″ (embossed panel), 3-3/4″ x 5″ (inside panel)
Silver Foil – 1″ x 1″ (die cut star), 2-7/8″ x 4 3/8″ (DSP mat)
Whimsy & Wonder Specialty DSP – 2-3/4″ x 4-1/4″ (front background),  3-3/4″ x 1/2″ (inside trim)

Partial Product List

Links by TheseAreMyStamps.com

Friday, October 8, 2021

Stampin' Up! Whimsical Trees Joy Fold Christmas Card

TGIF, peeps! Whatcha doin' for the weekend? I'm cleaning out file drawers UNLESS I get side tracked by You Tube, Facebook Lives or blog hopping. Somehow card making usurps mundane jobs! I detest paperwork unless it's working with paper, i.e., cardstock and patterned paper! I'm sure you understand!!

Let me show you what I made for today. My teammate, Karen Ksenzakovic, will recognize the fold right away! You can see hers here.


This Joy Fold card is so easy to create. I used Beauty of the Earth Designer Series Paper, Misty Moonlight cardstock, Mossy Meadow cardstock and Basic White cardstock. Measurements are listed below. My sentiments and images are from the Whimsical Trees Stamp Set. I used Tasteful Labels Dies and Layering Circles Dies for the stamped tree and mat. The embellishments are from the Holiday Rhinestone Basic Jewels (Night of Navy).

The opened fold...

Measurements: 

Misty Moonlight: 8 1/2" x 4 1/4", scored and folded at 5 1/2" (base) and 8" x 3", scored and folded at 4" (fun fold); scrap for circle mat for tree

Beauty of the Earth DSP:  4" x 5 1/4" (inside); 2 3/4" x 4" (left side front flap)

Mossy Meadow: 2 7/8" x 3 7/8" (2) (front flap mat for sentiment and inside flap mat for sentiment)

Basic White: 2 3/4" x 3 3/4" (2) (front sentiment/image and inside flap); scrap  for die cut tree circle

So, you can either watch TOK's (the other Karen) video for instructions or ask me for directions by leaving a comment with an email address so I can respond.

I'm entering my card in these challenges:

Atlantic Hearts Sketch Challenge #441

Creative Creases ATG with fun fold #16

Craftyhazelnut's Christmas Challenge #562

Craftyhazelnut's Patterned Paper October 2021

Thank you for stopping by today and go have yourself a fantastic weekend!

Partial Product List

Links by TheseAreMyStamps.com

Thursday, October 7, 2021

Stampin' Up! Pretty Pumpkins Friendship Card for the Happy Inkin' Thursday Blog Hop


Welcome to the Happy Inkin' Thursday Blog Hop. This week we have a theme challenge. If this is your first time here, welcome! If not, welcome back!! Either way, you're in for a treat!!! I used the Pretty Pumpkins Stamp Set and coordinating  Detailed Pumpkin Dies to create my card for today. The fold saves on cardstock, while using up that DSP that we all love to hoard!

Have you guessed our theme?
Did you think it was pumpkins? Inspired By did!!
The inside...

Measurements:

4 3/4" x 5 1/2" Rich Razzleberry cardstock scored along the 4 3/4" side at 4 1/4" to form the card base
4" x 5 1/4" Blackberry Beauty Specialty Designer Series Paper (next time I will do 4 1/8" x 5 1/2")
4" x 5 1/4" Gold Foil Paper (inside)
3 3/4" x 5" Very Vanilla Cardstock (inside)
Scraps of Mossy Meadow, Gold Foil and Very Vanilla

On the scored portion, I folded it, burnished it and added a strip of Tear & Tape. I adhered the DSP to it.  I don't really like the gap at the top and bottom so that's why I will change the measurement for next time. I was inspired by Linda Bauwin for the fold.

I moved to the inside, cutting the pumpkins out of the Gold Foil, being sure to stay within the confines of the sentiment panel I would lay on top of it. They were cut with a die from the Detailed Pumpkin Dies. I set them aside while I stamped the sentiment from the Pretty Pumpkins Stamp Set with Rich Razzleberry ink. I used a die cut flower image from the Blackberry Beauty Ephemera Pack adhering it with liquid glue.  I adhered that panel to the gold and adhered the gold to the card base, making sure it lined up with the front panel of DSP.

Then I went back to the front and adhered the gold foil pumpkins, with Stampin' Dimensionals and adhered my die cut leaves with glue dots. I placed the pumpkins in the corner because I wanted to play at Global Design Project #312.
I stamped my sentiment from the Pretty Pumpkins Stamp Set in Rich Razzleberry on scrap Very Vanilla and fussy cut it, adhering it with Stampin' Dimensionals.

I'd also like to enter my card in NBUS Challenge #31 (I have never used the Pretty Pumpkins Bundle before) and Double Trouble Challenge #94. I am playing with all three things so I must also play at Use Your Stuff #433 Autumn/Fall.

Thank you for visiting today. Now, on with the hop! Clicking on the "next" button will take you to Karen Ksenzakovic. Clicking on the names listed below will take you directly to team members and their projects. Thank you for hopping with us.

Wednesday, October 6, 2021

Stampin' Up! Autumn Thinking of You Card

Happy mid-week, peeps! Today's post is a quicky. This is a card we made at our in our Card Group and Sue L. prepared the kit for us. All we had to do was assemble and glue! I have no idea what dies were used nor what stamp set was used for the sentiment but if you are interested, I will check with Sue.


I do know the embossing folder is the retired Woodland EF! Aren't these leaves gorgeous?

I'm entering my card in these challenges:

Have a great day and thanks for stopping by. I hope you'll be back tomorrow for our Happy Inkin' Thursday Blog Hop.

Tuesday, October 5, 2021

Stampin' Up! News!!


At midnight Mountain Time the Stampin' Up! Clearance Rack will be updated with new items! Woo hoo!! Supplies are limited, with discounts up to 60%, and products will go quickly. So head over there early to get some great deals! For us in the Eastern Time Zone, it'll be 2:00 AM!

NEW KIT – JUST IN TIME FOR HOLIDAY GIFTING!!
Love, Santa Tag Kit!


Santa’s back in a fun and easy tag kit to spruce up your Christmas gifting! The Love, Santa Tag Kit (item 158375) has everything you need to create 12 whimsically designed tags.


That means you’ll find printed die-cut tags and labels, sequin embellishments, pink and white baker’s twine, an exclusive stamp set, a Night of Navy Classic Stampin’ Spot, and more in this all-inclusive kit! You can sleigh ride right in without the prep work. This is the exclusive photopolymer stamp set included in the Love, Santa Kit.


Love, Santa Tag Kit Details:
  • Kit contains enough supplies to create 12 tags—3 each of 4 designs.
  • Includes printed die-cut tags, decorative die cuts, adhesive, embellishments, and pink baker’s twine.
  • Features an exclusive stamp set and a Night of Navy Classic Stampin’ Spot.
  • Finished tag size: approximately 2 1/2″ x 4 3/4″
  • Coordinating colors: Bumblebee, Just Jade, Night of Navy, Polished Pink, Poppy Parade
  • Item number 158375...$19.00
  • Available to purchase beginning Wednesday, October 6
Love, Santa Treat Bags – Also Available on October 6!

That’s right—figuring out how to dress up your gifts this year is no longer a “Claus” for concern! But don’t relax too soon as these products are based on availability!

Check out the unboxing and instructional video here:


This is my second post today. I am a hobby demonstrator but if you'd like to help me with my fourth quarter quota (say that 3 times fast!), I'd be very appreciative. Just click on the "Shop in My Online Store" tab and place an order. TIA!


Stampin' Up! Inspired Thoughts Fun Fold Thank You

Happy Tuesday, peeps! Hope you survived your Monday! My card today is a CASE of Lisa Curcio. We made this card at our Thursday Card Group and Sue M. provided the kit. Lisa has a You Tube video showing how to make it. Here's my front...


Here's the pop up...


These are the supplies I used:

Old Olive Cardstock

Delightful Daisy DSP (retired)

Gold Glitter Paper (retired)

Basic White Cardstock for sentiment on front and inner panel

Wishing You Well Stamp Set (retired) for the front sentiment 

Daisy Delight Stamp Set (retired) for the front daisy and inside stamped flowers 

Pear Pizzazz Ink for flower stems inside

Old Olive Ink for sentiments

Daffodil Delight Ink for stacked daisy on front and flowers inside

Daisy Punch

Stampin' Dimensional to separate stacked daisy

Liquid Glue

Pre-made bow

Measurements:

Card Base: 8" x 8", score at 4", turn and score at 4"; you have 4 equal squares; score on the diagonal on one of the squares

DSP:  1 1/2" x 4" front strip; 3/4" x 3" sentiment mat; 3 3/4" x 3 3/4" (3) for insides; cut one on the diagonal

Basic White: 3 1/2" x 3 1/2" for inside image/sentiment; 1/2" x 3" for banner sentiment on front

Gold Glitter: 1/2" x 4"

I'm entering my card at Creative Creases #16 ATG with a fun fold. Stop by Debbie's site and say "hello". Better yet, enter her challenge!

Thank you for stopping by today and if you have any questions, leave a comment and I'll get back to you asap.


Monday, October 4, 2021

Stampin' Up! Happy Holly-Days Christmas Card

Welcome to Monday Makeover Madness. My card today is a makeover of my teammate, Jaimie Babarczy, who gave me the idea on her FB video for WCMD Saturday. Unfortunately, she hasn't posted her card yet so I can't provide a link. However, once it posts, I'll update my post.

Here is mine...


My card base is Thick Basic White cardstock. I cut a piece of Tidings of Christmas DSP and adhered a strip of Red Foil to it. I cut a piece of Basic White cardstock and stamped the branches from the Merriest Moments Stamp Set on it with Evening Evergreen ink. I stamped the "Noel" from the Happy Holly-Days Stamp Set in Real Red using my Stamparatus. Then I stamped it with Versa Mark Ink, sprinkled it with Clear Embossing Powder and heat set it.

I stamped the bird from the Happy Holly-Days Stamp Set with Memento Tuxedo Black ink and cut it out. I colored it with Light & Dark Crumb Cake Stampin' Blends. I adhered it with Stampin' Dimensionals. I added three Holiday Rhinestone Basic Jewels.

The inside is clean and simple...


I adhered a strip of the same DSP and stamped the sentiment from Happy Holly-Days in Evening Evergreen.

I'm playing at a new site today: Peace on Earth Christmas Challenge #1 - ATG. Do stop by and say hello! I'm also entering my card at my ole faithful Craftyhazelnut's Christmas Challenge #562 and Make My Monday Challenge #158 "Embossing".

Thank you for stopping by today and here's your reward...


Sunday, October 3, 2021

Stampin' Up! Whimsical Trees

Good Sunday morning, peeps! Were you able to enjoy all the videos yesterday for World Card Making Day? I CASE'd one of my teammate's cards that I will show you tomorrow. Members from Amy's Inkin' Krew demonstrated a card every hour on the hour from 9 - 5 and each one only took 30 minutes to make. It was a lot of fun.

My card today is one we made at our Thursday card group. Sue L. prepared the kit for us and all we had to do was stamp and color the scene and glue the silver foil parts on the front and the corner inside. I finished the inside when I got home, using a sentiment from the Whimsical Trees Stamp Set.


The image is similar to a stamp by Tim Holtz or Inkylicious, both are still available. The "Merry Christmas", tree and bell are stickers.


I'm playing at Craftyhazelnuts' Christmas Challenge 562, Jingle Belles "Let It Snow" challenge and Festive Friday Challenge FF#0094 using red, green and tree from the Inspo List.

Thank you for stopping by today and I hope you have a blessed Sunday.

"And to all these virtues, add love, which is the perfect bond."

Col. 3:14


Saturday, October 2, 2021

Stampin' Up! Feels Like Home Thank You Card

Good Saturday morning, peeps! Are you ready for World Card Making Day? I am! I can't wait to see what my team makes today. Just ask to join here.

My card today was made 9/30 when the product was current. Today none is available from Stampin' Up! but you can buy them online from individuals. It's a card we made Thursday at card group.

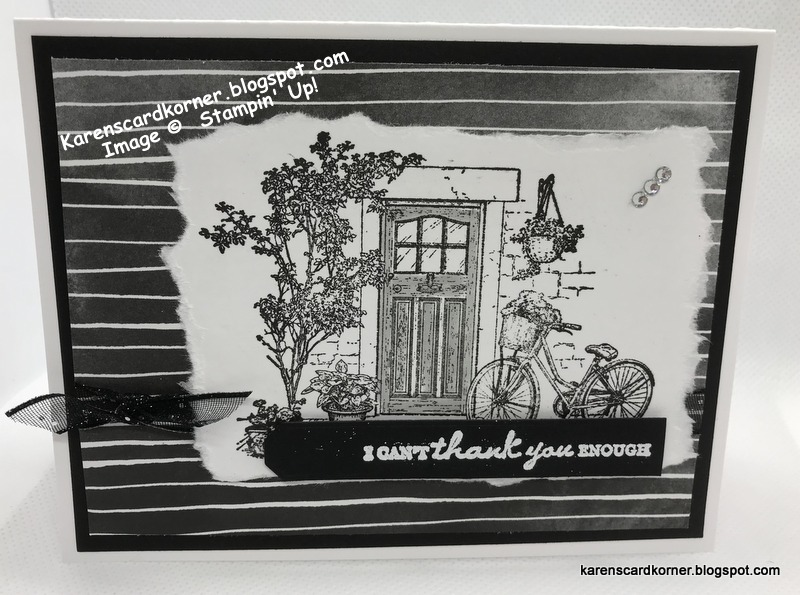
I used the Feels Like Home Stamp Set from Sale-A-Bration to stamp the image and the sentiment. The Beautifully Penned DSP provides the background. The ribbon is current, as is the white embossing powder. The rhinestones are retired. The inside is black with the exception of a strip of the DSP. My card was inspired by By the Shore Stamping.

I'm entering my card at Craftyhazelnut's Patterned Paper October 2021 and Allsorts 644 "I Love" Challenge (I love monochromatic black & white cards!)


Thank you for stopping by today, I'm off to watch my teammates create! Hope you'll join me. 

Friday, October 1, 2021

Stampin' Up! Beauty of Friendship Fun Fold Sympathy Card

 TGIF my peeps! Can you believe it's October?? Where did the summer go? Living in SWFL, I am happy to see summer go and we're one month closer to being out of hurricane weather. 

Are you familiar with Michelle Zindorf? She is quite the artist and card maker. I watched two of her videos and decided to combine the two as an inspiration for my fall card today. 

Unfortunately, I needed another sympathy card. When you live in a 55+ community, it's more than likely a given. We had 5 deaths this week. I knew 4 of the people. I made one for a gentleman whose wife passed. She was a delightful person. We were in the NY/NJ Club together. They were married for over 60 years!


I cut the tree out of thick Basic White cardstock and used the negative part as a stencil, stenciling the tree using light to dark brown inks with my blending brushes. I sponged the cut out tree with Early Espresso ink, also sponging around the edges. The bottom is sponged with varying shades of orange. The sky is sponged with yellow and gray. All products are listed below along with measurements.


I used these products to create my card:

  • Crumb Cake Cardstock
  • Basic White Cardstock
  • Sahara Sand Ink
  • Crumb Cake Ink
  • Smoky Slate Ink
  • Early Espresso Ink
  • So Saffron Ink
  • Pumpkin Pie Ink
  • Cajun Craze Ink

  • Beautiful Trees Dies
  • Inspired Thoughts Stamp Set
  • Beauty of Friendship Stamp Set
  • Vintage Leaves Stamp Set (retired)
  • Gorgeous Grunge Stamp Set (retired)
  • Stampin' Blends - Light & Dark Pumpkin Pie, Cinnamon Cider & Daffodil Delight
  • Blending Brushes

Measurements:

Back: 4 1/4" x 5 1/2"

Mat on back: 4" x 5 1/4"

Flap: 2 3/4" x 4 3/4", scored at 4 1/4"

Art Panel: 3 1/2" x 4 1/2"

Mat for Art Panel: 3 5/8" x 4 5/8"

I'm entering my card in these challenges:

Watercooler Wednesday WW325 Heidi's All Things Masculine


Thanks for stopping by today and have a great weekend.


Stampin' Up! Autumn Leaves Thinking of You Card

Hello again, peeps! This is my second post today because I wanted to enter the Freshly Made Sketches #776 Challenge. I needed a quick sympat...