Sunday, July 31, 2022

Stampin' Up! Pampered Pets Sympathy Card

Good morning, peeps! I lost my furry granddogter on July 4. She went to be with her brother, Rascal, and her kitty cousin, Tini...along with many other fur babies we've all had over the years.  I made this card for Nikki's parents. I drew my color inspiration from the Inkspirational Challenge #270 photo...


My card base is Gray Granite cardstock. I glued strips of Hues of Happiness Designer Series Paper to a Very Vanilla cardstock mat reflecting the Rainbow Bridge without the bridge. I stamped Nikki in Basic Gray using the retired Pampered Pets stamp set and cut her out with a die from the retired Pets Dies. I colored her with Light and Dark Gray Granite Stampin' Blends. I cut a frame with the Stylish Shapes Dies and adhered her to the corner. Then I mounted the frame with adhesive strips. The sentiment is from the same stamp set. I also sponged the edges with Gray Granite ink.

I forgot to take a picture of the inside before I personalized it but it had 5 paw prints for the family with their names and a stamped sentiment from the retired Happy Tails stamp set.

Thank you for stopping by today. I hope you'll return for my Monday Makeover Madness tomorrow and help yourself to some M & M's.

Saturday, July 30, 2022

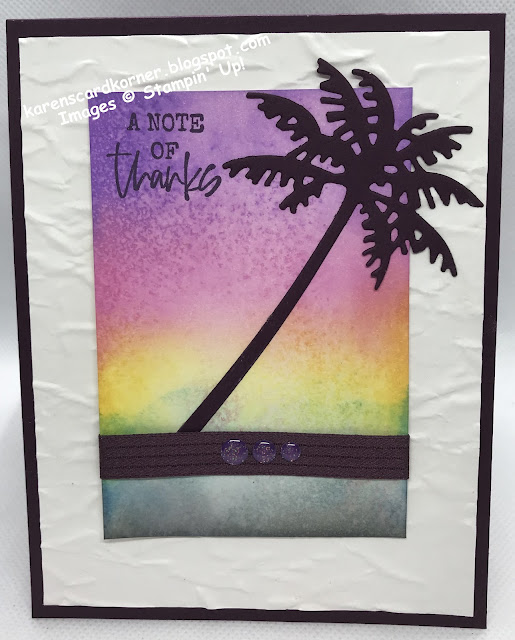
Stampin' Up! Paradise Palms Sunset Thank You Card

Good Saturday morning, peeps. Funny how fast weekends roll around, but also how quickly they roll out to sea. Speaking of sea, let me take you to the beach again!

Although it looks black in the photo, my card base and palm tree are Blackberry Bliss cardstock. I cut the palm tree out with a die from the Palms Dies. The embossing folder I used for the Basic White piece of cardstock is the retired Old World 3D EF. 

Then I sponged another piece of Basic White cardstock with Gorgeous Grape, Melon Mambo, Daffodil Delight, Granny Apple Green, Pacific Point and Blackberry Bliss inks.

The ribbon across the bottom is the retired Blackberry Bliss 3/8" Stitched Satin and the three embellishments are retired Glitter Enamel Dots. I wish I had little shells to adhere to the ribbon instead...maybe on my CASE of this one! Stay tuned!!

I used the Wildlife Wonder Stamp Set for my sentiments and Blackberry Bliss ink. The palm trees are from the Paradise Palms Stamp Set. I used my Stamparatus, Old Olive and Early Espresso Stamp N Write Markers to ink up the stamp.


I'm entering my card in the Time Out Challenge #219 with their photo prompt


and Can You Handle the Pressure? AG Embossing with Twist of the Beach - now that my back is healed I can do the twist again!

Thank you for stopping by today and I hope you'll be back tomorrow as I'll have more rainbow colors for you.

Friday, July 29, 2022

Stampin' Up! Nature's Prints Thank You Fun Fold

TGIF, especially if you've been working all week!! My card today is another Triple Diamond Tent Fold just like yesterday. This is the one I created for yesterday's blog hop; however, at the last minute I realized the challenge was NOT Crumb Cake color but rather Gray Granite. (I definitely like that color better!) Good thing this card is quick, easy and fun to make!!


I think this version is a little more feminine than yesterday's. Do take a look at that post if you want to know how to create it.

I used the same pack of Sun Prints Designer Series Paper, just a different pattern. Instead of using DSP for the center diamond, I stamped the ferns and sentiment from the Nature's Prints Stamp Set on Basic White cardstock, the mats are Starry Sky. My inks are Night of Navy stamped off once and Crumb Cake. I added two different sized 2022-2024 In Color Matte Decorative Dots.

Thank you for stopping by today and I hope you'll stop by Creative Creases Challenge #37 - Anything Goes with a Fun Fold, as that's where I'm entering my card today...and I'm also a Guest Demonstrator there! Here's to a good weekend for you and do come back tomorrow as I will be taking you to the beach again!

Partial Product List

Links by TheseAreMyStamps.com

Thursday, July 28, 2022

Stampin' Up! Nature's Prints Masculine Card for the Happy Inkin' Thursday Blog Hop


Welcome to the Happy Inkin' Thursday blog hop. You're in for a treat if you have never visited before. It's a weekly challenge and this week we have a color challenge. Links to the team hoppers are at the bottom of this post, along with measurements and product used. I was inspired by Iced Images. The demonstrator called it a Triple Diamond Tent Fold card. 

Here are our challenge colors...


I chose all five! Such an over-achiever...lol! 
This card is so easy to make and I've made two already. You'll see the other one tomorrow and you'll know why I made two! My team already knows...lol.

So, this is what I used and how I put it together:

4 squares of Gray Granite cardstock 3" x 3"
3 squares of Pacific Point cardstock 2 3/4" x 2 3/4"
3 squares of Sun Prints DSP 2 1/2" x 2 1/2"

  • Adhere the three Pacific Point mats to three of the Gray Granite squares. 
  • Adhere the DSP to those three squares, turning them into diamonds. 
  • Take the remaining Gray Granite square and score it diagonally at 2 1/2". Fold and burnish. You now have a triangle!
  • Make a tickmark at 2 1/8" on the 4 1/4" side of the triangle and draw a pencil line from the tickmark to the point. 
  • With the point at the bottom, line up one of the patterned diamonds with the top point on that tickmark making sure both bottom points are even. Your grid paper helps with that! 
  • Draw a line along the edge of that diamond. 
  • Take another patterned square and line it up the same way doing the same pencil line along the edge. 
  • Put liquid glue on the two triangles you just created with the pencil lines and adhere the diamonds to the center triangle so that the points meet and all three bottom points are even, still using your grid paper. 
  • Take the remaining diamond and place it over the center triangle lining up the point and edges. Flip the card over and make tickmarks so you will know where not to put glue! 
  • Once you've got your glue down, line up the bottom center diamond with the bottom of the center triangle, press together and you're done! It should stand up perfectly. Here's a refresher...

The oval sentiment and splotches from the Nature's Prints Stamp Set are stamped full strength and second generation, respectively. It's punched with the Double Oval Punch and adhered with Stampin' Dimensionals.

Here is what the back should look like...this is a sneak peek of my card for tomorrow!
and the side view

If I have totally confused you, you can always watch the video!

I'm entering my card at Creative Creases #37 - AG with a Fun Fold, where I am currently a Guest Designer. I hope you will visit Debbie's challenge after you finish our hop!

Clicking on the "next" button will take you to Akiko. Clicking on the names listed below will take you directly to team members and their projects. Thank you for stopping by and hopping with us! I hope you'll be back tomorrow for my fun fold.

Amy Koenders
Mary Deatherage
Kristi Gray
Sue Prather
Karen Finkle - you are here!
Akiko Sudano
Karen Ksenzakovic
Tara Carpenter
Terry Lynn Bright

Wednesday, July 27, 2022

Stampin' Up! Biggest Wish Birthday Card

Good mid-week morning, peeps! Time is flying by, isn't it? Can you believe we are almost out of July days?  It was three years ago during Sale-A-Bration that the Designer Series Paper I chose for today's card was out and about. I was so sad when it retired. This is the stack, cut and shuffle card with a mat that I mentioned in my post yesterday. There are two main differences between the card yesterday and this one. This one has a mat AND I chose not to shuffle the stacks! Take a look see...


and here's the template for it...

My card base is Cajun Craze with a Very Vanilla mat. The sentiment is from Nature's Prints Stamp Set, punched with the Label Me Lovely Punch, sponged with Cajun Craze ink and adhered with Stampin' Dimensionals. I added a Brushed Brass Butterfly as my friend cannot get enough of butterflies!

For the inside I used three sentiments from the Biggest Wish Stamp Set, stamped with Cajun Craze ink and added a 4" x 1/2" strip of DSP.


The Butterfly Challenge is back and I'm thankful! I'm entering my card in Challenge #171. I am not doing the S is for Spanner Card, but I am using three of the colors she required...Sky Blue, Salmon, Sage.

Thank you for stopping by today and I hope you'll be back tomorrow for our weekly Thursday Happy Inkin' Blog Hop.


Tuesday, July 26, 2022

Stampin' Up! Wonderful World Thank You Card

I was inspired by Lisa Freeman for my card today. There are a lot of  You Tube videos out there for the Stack, Cut & Shuffle technique but hers is the one I decided to CASE. Thank you, Lisa! I'm entering my card in the Make It Feminine Challenge at Try It On Tuesday.


First thing on my agenda was to choose my DSP. I needed four pieces 4" x 5 1/4"  and arranged them in a stack to cut per the template below. (Tip: a guillotine works the best for cutting through 4 pieces!) I chose the Wonderful World Designer Series Paper. It's free, as is the Wonderful World Stamp Set, with a purchase of $100 before s/h during the  1 July - 31 August Sale-A-Bration promotion.

I also needed to pick the color of my base. I cut two pieces of 8 1/2" x 11" Blackberry Bliss cardstock in half at 4 1/4" and scored at 5 1/2". I didn't fold and burnish the bases until all the pieces of DSP were adhered. 


This card is not matted, but I did make one that does have a mat. That's why you see the second set of measurements on this template. I have a photo of the template for that but I haven't found it yet! I'll post it when I post the matted card...probably tomorrow.

To arrive at the placement of the cut pieces, I just laid them out in the order they were cut in stacks, left the first stack alone but shuffled the top piece of the second stack to the back of the pile. For the third stack, I shuffled the top two pieces one at a time to the back. and for the fourth stack, I shuffled the top three pieces one at a time to the back. 

Next I took the top piece of each stack and laid them out on each base per the template to be sure I really liked the patterns the way they came out. Once I was pleased, I adhered them with liquid glue, leaving a 1/8" border.

I used a sentiment from the Go To Greetings Stamp Set. It's stamped in Blackberry Bliss ink on a scrap of Basic White, punched with the Banners Pick A Punch and sponged with BB ink. I adhered it to the card front with Stampin' Dimensionals and adhered a double loop Linen Thread bow. I also added a Fresh Freesia Fun Flower Resin Shape to the sentiment.

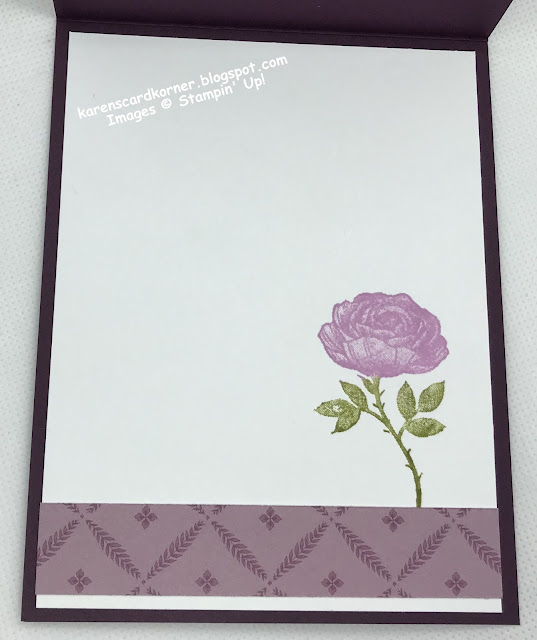
The inside is finished with a strip of the DSP and stamped with the rose from the Wonderful World Stamp Set. I mounted the stamp on my Stamparatus and colored each part separately with my Fresh Freesia and Old Olive ink pads and sponge daubers. I had a smudge on the stem so I created thorns...lol.

Let me know if you give this a try. It's such a quick and easy way to make a number of cards assembly line fashion AND use up that patterned paper that we all love to hoard!

Thank you for stopping by today and I hope you have a very enjoyable Tuesday. See you tomorrow...I hope!

Partial Product List

Links by TheseAreMyStamps.com

Monday, July 25, 2022

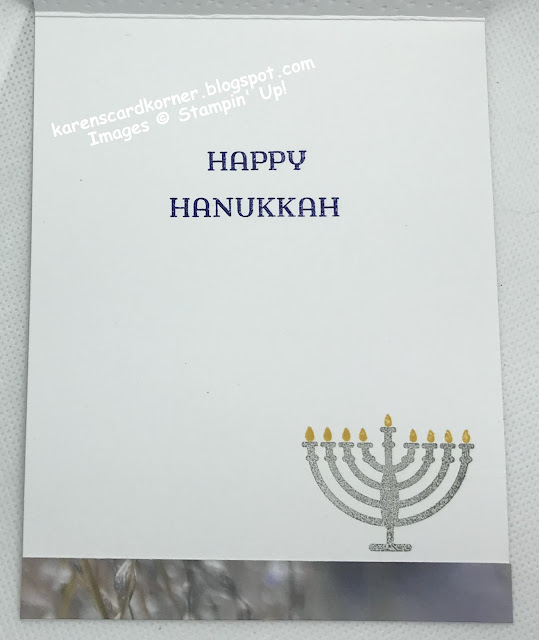
Stampin' Up! Hanukkah Card

Welcome to my Monday Morning Makeover Madness card. Everyone seems to be doing Christmas in July and I have decided to do Hanukkah in July! Take a look see...


and the inside...


My card is a makeover of this one...


Same Designer Series Paper, Embossing Folder, Silver Foil, Ribbon, punch, different layout and embellishments (Iridescent Rhinestone Basic Jewels). It was created for LeAnne's sketch challenge at the Paper Players.


I'm also entering my card at Pammie's Inky Pinkies Challenge 2230 - ATG.

Thank you for stopping by today and grab some M & M's for your sweet tooth!
Have a blessed day.


Saturday, July 23, 2022

Stampin' Up! Sunkissed Birthday Card

Good Saturday morning, peeps. Are you going to the beach today? I am! It's really too hot and humid to go to a real beach so let me take you to mine. Ready? Here we go!


My card base is Basic White cardstock. I took another piece and scored lines every half inch after sponging it with Rich Razzleberry, Flirty Flamingo, Daffodil Delight and Pool Party inks. I cut the bottom and top to make it only 1/4" from score line to edge.

I cut 1/4" pieces of Blackberry Bliss, Flirty Flamingo, Daffodil Delight and Pool Party cardstock and adhered them to scrap Basic White piece. Then I cut it out with a heart shaped die. The palm tree is foiled from awhile ago and cut with one of the Palms Dies.

The sentiment is from the Sunkissed Stamp Set, inked with VersaMark, heat set with White Embossing Powder and cut out with one of the Stylish Shapes Dies. Then I sponged it with Blackberry Bliss and Rich Razzleberry inks. I adhered it with Stampin' Dimensionals. Everything else was adhered with liquid glue.

For the inside...


I cut a mat of Blackberry Bliss for my art panel. All the sentiments and image are from the Sunkissed set, stamped with Blackberry Bliss ink. The coloring is done with with Stampin' Blends (Light Crumb Cake, Flirty Flamingo, and Daffodil Delight). I sponged some Pool Party ink in the center to create a sky/water feeling.

I'm entering my card in these challenges:

 Allsorts Challenge Blog: Week 686 - Summer

Fusion Beach Tiers Challenge

and Let's Craft & Create Challenge #185 - AG + Fun in the Sun.

Don't you feel refreshed now in this hot, humid weather we are having? Thank you for stopping by.

Friday, July 22, 2022

Stampin' Up! Hello Harvest Thinking of You Fun Fold Slimline Card

TGIF, peeps! It's another Fun Fold Friday AND I'm honored to be Guest Designer once again for Creative Creases Challenge #37! I hope you will play along and enter a card in Debbie's Always Anything with a Fun Fold challenge.

My card today was inspired by Linda Bauwin and it's a great design. Let me show you the various stages of opening...


Here are the deets in a pumpkin shell:

Merry Merlot Cardstock: 8 1/2" x 3 3/4" (2); cut one on the long side at 4 1/4" and score each end at 3/4"; burnish, fold, and adhere to remaining piece, which forms the card base

Rustic Harvest DSP: 3 3/8" x 3 5/8" (2) (Tip: be mindful of the pattern direction and match up your pieces on the flap before gluing!); different pattern 5/8" x 3 5/8" strips (2); adhere with liquid glue

Scrap Merry Merlot for banner sentiment (Hello Harvest Stamp Set); stamp with VersaMark Ink and heat emboss with White Embossing Powder; cut out with Rustic Pumpkin Dies; adhere left half to flap with Stampin' Dimensionals

Basic White Cardstock: 6 3/4" x 3 1/2"; stamp image in Cajun Craze; color pumpkin with Stampin' Blends (Light and Dark Cajun Craze, Light Daffodil and Color Lifter); color stem with Mossy Meadow Stamp N Write Marker. Stamp corners in Crushed Curry and the sentiment in Merry Merlot. Adhere to inside with liquid glue.

I hope you enjoyed my card. I'd love to see your creation of this easy fun fold in the Creative Creases Challenge #37! Have a great weekend.


Thursday, July 21, 2022

Stampin' Up! Brightest Glow Christmas in July


Welcome to the Happy Inkin' Thursday blog hop. You're in for a treat if you have never visited before. It's a weekly challenge and this week we have a sketch challenge. Links to the team hoppers are at the bottom of this post, along with measurements and product used.

Here is what I created...

and the inside...
I'm entering my card in the Double Trouble Challenge #116 Christmas in July who is partnering with Jingle Belles (Bling on the Holidays) and TGIF #377 Merry Little Christmas.


Clicking on the "next" button will take you to Akiko. Clicking on the names listed below will take you directly to team members and their projects. Thank you for stopping by and hopping with us! I hope you'll be back tomorrow for my fun fold.

Amy Koenders
Mary Deatherage
Kristi Gray
Sue Prather
Karen Finkle - you are here!
Akiko Sudano
Karen Ksenzakovic
Tara Carpenter
Terry Lynn Bright

Measurements and Product Used 

Soft Succulent Cardstock Base: 5 1/2" x 8 1/2", scored and folded at 4 1/4"; 5 1/2" x 4 1/4" embossed panel (Timeworn Type 3D EF)
Light Aglow Specialty Designer Series Paper: 5 1/2" x 2"; 5" x 1/2" inner strip; scrap for circle for second largest Stylish Shapes Dies
Silver & Gold Specialty Paper: 3 1/2" x 3/4"
Basic White: 3" x 3/4" for sentiment banner punched with Banners Pick A Punch; edged and stamped with Soft Succulent Ink; 5 1/4" x 4" inner liner
Sentiments: Brightest Glow Stamp Set
Mutipurpose Liquid Glue
Stampin' Dimensionals

Partial Product List

Links by TheseAreMyStamps.com

Stampin' Up! Cheerful Daisies Birthday Card for the SU Demos Fun Fold Hop

Hello my FB peeps! Welcome to our monthly Stampin' Up! Demos Fun Fold Blog Hop!! The participating demonstrators are listed at the end o...