Sunday, May 31, 2020

Stampin' Up! Botanical Prints Product Medley

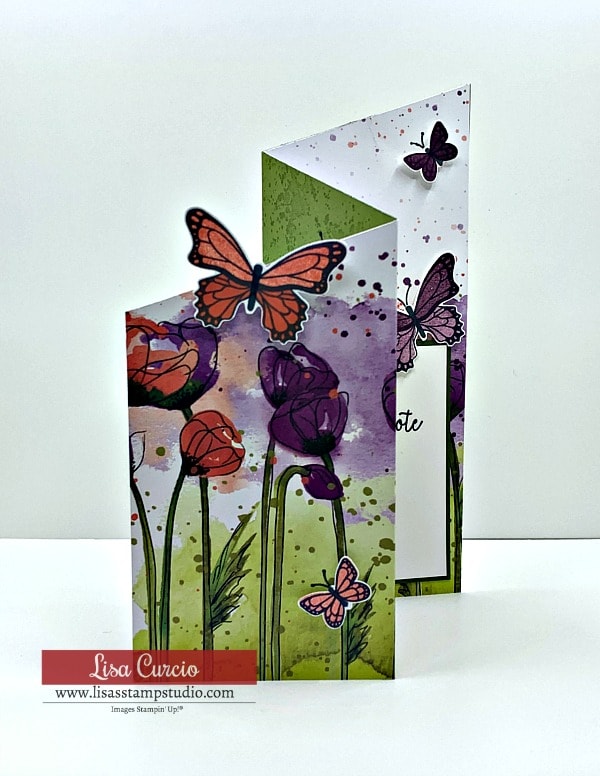
My card for you today is a cut that was inspired by Sherrie, a demonstrator from Peterborough, Canada. Our neighbors behind us are from there. I wish they could stay in FL longer than 6 months, but rules are rules.

Sherrie called this a "split cover" card. She has a video on You Tube for it. Here's my card....


Now, I would like your opinion...should I put a sentiment on it or is the Floral Essence flower enough? I'm entering my card at Sketch Saturday: Week #612 2017 Sketches and I am using their sketch #451 by Debra. 


I created mine a little differently than Sherrie. Here's her card...

splitcover

I let the DSP from the Botanical Prints Product Medley Kit (retiring 6/2 at $42!) form the front of my card. My card base is Pretty Peacock 4 1/4" x 11", scored and folded at 5 1/2".  I adhered a mat of Whisper White cut at 4" x 5 1/4". On the DSP, which is cut 3 3/4" x 5", I marked down 1/2" from the top left and down 3" from the top right. I placed it in my paper trimmer and cut diagonally lining up those two marks.

From the left side, I made a mark 1/4" down from the cut point. On the bottom I measured 3" from the bottom left and cut diagonally from mark to mark.

I cut two strips of Whisper White card stock 1/2" x 6", adhered it to the two corner pieces with liquid glue and snipped off the ends. I did a dry fit so I would know where I wanted to adhere the middle piece of DSP that was left over from the corner cuts. Then I adhered the corners.

The flower is stamped in Pretty Peacock, twice, on a scrap of Whisper White and punched out with the Perennial Flower Punch and adhered with liquid glue.

I have done nothing to the inside as I am waiting to see if I'm going to put a sentiment on the front.

Thank you for stopping by and, hopefully, you enjoyed my card. Goodbye, May!

Product List

Saturday, May 30, 2020

Stampin' Up! Itty Bitty Birthdays Pressed Petals Part 1

Are you wondering about the "Part 1"? Well, stay tuned for the first Monday in June!

My inspiration came from Sharon Armstrong for this one.


I love the Pressed Petals DSP and I'm trying to use it up before it retires June 2. What better way than to let it do all the work on the card for me! The sentiment is from Itty Bitty Birthdays. I punched it out with the Story Label Punch and also punched out a Mossy Meadow mat for it. The bow is Linen Thread. The ribbon covering the seam is from the Botanical Prints Medley Kit, which is retiring so I have listed a substitute below. I added three Champagne Basic Jewels. The inside is blank.

Here's a pic of Lord Chesterfield enjoying the screened in porch of our rented house. We are on our way back to Florida today. Yikes, where did the time go?


Our boy loves it here, as do we, and none of us has looked forward to that 10 hour drive back to hot, humid weather. We didn't get a chance to look for houses in the area due to COVID 19, nor did we stray too far, too often from the river. Waterfalls, vineyard, Ingles, Walmart and pick-up pizza were the extent of our adventures! Hopefully things will have changed by the end of September when we return.

Thank you for stopping by today.

Partial Product List

Friday, May 29, 2020

Stampin' Up! Butterfly Gala Pressed Petals Thank You Card

My card for you today is made with the Butterfly Gala Stamp Set and the leftover piece that I cut from my card Wednesday. I have a top that has these flowers and colors in it. I'll come back and insert a photo of it once it's out of the wash! So, Cardz 4 Galz #122 is a CASE Your Wardrobe Challenge. This is very fitting for my card.


I took the cut angle from Wednesday and made it so it was 5 1/2" tall, glued it to the Crumb Cake card front and then stamped the sentiment from Butterfly Gala in Night of Navy at an angle. The "greenery" is a stamp from the February 2020 Paper Pumpkin Kit and is Pear Pizzazz stamped off once.

I used the PP Kit stamp again on the inside. The sentiment is stamped in Mossy Meadow on Very Vanilla Card Stock. It's from the Notes of Kindness Kit. Easy peasy card! 

I love the pattern of this DSP so I'm entering my card in the challenge at Cardz 4 Galz #122 CASE Your Wardrobe, at Aud Sentiments #152 Flowers + Sentiment and Moving Along with the Times - Flowers.

Thank you for stopping by. Today is our last day in NC. We are going to miss this tree that is between the open porch and the screened porch!


Thursday, May 28, 2020

Stampin' Up! Good Morning Magnolia Birthday Card for the Happy Inkin' Thursday Blog Hop


Welcome to the Happy Inkin' Thursday blog hop. You're in for a treat if you have never visited before. It's a weekly challenge and this week we have a color challenge. I can't wait to see what the other team members created. Hop along with us at the bottom of my post.

Image may contain: text

I used several stamp sets to create my card for you today: Magnolia Blooms, Good Morning Magnolia and Itty Bitty Birthdays.


I started out by lightly sponging the center of a Thick Whisper White card base with Mango Melody Ink.

I cut a piece of So Saffron Card Stock and stamped the small bud from the Magnolia Blooms Stamp Set using So Saffron Ink. It is difficult to see in the photo. I then ran it through my embossing machine with the Subtles 3D Embossing Folder. I adhered it to my card base with liquid glue.

Then I cut a strip of Ornate Garden Specialty Designer Series Paper and adhered that.

I stamped two buds from the Good Morning Magnolia Stamp Set, colored them with Light and Dark So Saffron Blends and Light and Dark Old Olive Blends. I cut them out with the Magnolia Memory Dies and adhered them with Dimensionals. I cut a leaf out of scrap Old Olive using the die set and adhered it with liquid glue. I had a couple three Old Olive Rhinestones from the Noble Peacock Rhinestones which are retiring AND are discounted.

The sentiment is stamped in Mango Melody and it's from the Itty Bitty Birthdays Stamp Set.

Now for the inside...


I stamped three of the buds from Good Morning Magnolia in So Saffron and the sentiment from Itty Bitty Birthdays in Mango Melody. I added a strip of DSP at the bottom.

I'm entering my card at Seize the Birthday 191


I hope you enjoyed my card today. My inspiration came from Cheryl Charland. Thank you for joining the hop. I'm never sure if you are coming over from Sue Prather or starting here, but clicking on the "next" button will take you to Eva Dobilas! Clicking on the names below will take you directly to the other team members and their projects.


Karen Finkle - you are here!
Karen Ksenzakovic 

Card Cuts in inches:

Base 8 1/2 x 5 1/2, folded and scored at 4 1/4
So Saffron strip 1 1/4 x 3 1/2
DSP 1 x 3 3/4 and 1/2 x 4 1/4 for inside
Scraps for buds and leaf

Wednesday, May 27, 2020

Stampin' Up! Butterfly Gala Pressed Petals Thinking of You Fun Fold

Good morning! Yesterday I watched Lisa Curcio make a card on You Tube.  Making a fun fold card is one of my favorite techniques. This is her card...
Make a Creative Greeting Card with a Unique Slant

Now we're going to play "Spot the Differences"! Mine...

Yeppers, mine is going the opposite way...ideal for a "leftie"! Hers is 7 1/4" x 9"; mine is 5 1/2" x 9". I used Pressed Petals Specialty Designer Series Paper and Crumb Cake Card Stock; Lisa used Peaceful Poppies DSP and Old Olive Card Stock. Lisa had a splatter stamp from Painted Poppies and, unfortunately, I chose to use a stamp from Floral Essence. It was too bold for my tastes. I probably should have stamped off twice rather than once. I liked the subtlety of hers. The placement and coloring of the butterflies are different.

Did you get them all?

I can't tell you how I made mine because I still have to figure out what I did wrong by watching Lisa's video again. Maybe I measured down from the top 3 1/2" to make my angle and I should have measured up from the bottom? All I know is that it's a fun card and a great way to use up retiring DSP. Thanks, Lisa, for sharing.

Thank you for stopping by to take a look see. I hope you'll be back tomorrow for our Happy Inkin' Thursday blog hop.

I'm entering my card in the challenges at:

Repeat Impressions ATG M2720
The Sisterhood of Crafters - Favorite Technique
Stamping Sensations - Say it With Flowers

Partial Product List

Tuesday, May 26, 2020

Stampin' Up! Ornate Style Itty Bitty Birthday Card

It's Twofer Tuesday! Yesterday I showed you one card using the daisy stamp from Ornate Style and today I'm using the same stamp. I also used the same DSP. BUT it's a Twofer because I did a different design and a different theme. I got the idea to do that from a challenge out there in Blogland; however, I was too late to enter! But, I am playing again at Stamping Sensations for their flower challenge. I hope my flowers will brighten your day.


My card base is Crushed Curry with a mat of Old Olive on which I stamped the Itty Bitty Birthdays sentiment in the corner with Memento Tuxedo Black Ink. I adhered a strip of Ornate Garden DSP to the mat and glued it to the card base.

I cut a piece of Crushed Curry as a mat for the daisy image from Ornate Style. The white was staring me in the face so I calmed it down by sponging with Old Olive ink. I think after doing this card that I am not a fan of daubers!

However, on the inside I was trying to achieve a bokeh effect with not having my background stamp for it nor acetate with holes cut in it. Remember, "necessity is the mother of invention". All I did was stamp the dauber once and then again, repeating the process many times. I stamped the daisies on the edge using the same stamp as the front and colored the centers with my Dark Pineapple Punch Blends.


Thank goodness there's a challenge out there for dots...Allsorts.

Hand Stamped Sentiments Challenge #340 has a beautiful photo inspiration challenge so I'll be entering there as well.


Thank you for stopping by today and who knows, tomorrow I might bring you more flowers! You won't be able to sing "You don't bring me flowers anymore" ...lol...earworm!


Monday, May 25, 2020

Stampin' Up! Ornate Thanks Friend Card

Monday, Monday and I have no makeover! It's a laid back Memorial Day for us. We used to celebrate after marching in the parade, ending up at the cemetery to honor and thank those who died in the military while serving our wonderful country.

My card today is a thank you card for a friend. I used the Ornate Style and Ornate Thanks Stamp Sets to create it along with a strip of Designer Series Paper from Ornate Garden.


My card base is Cajun Craze card stock. I had an already dry embossed piece of So Saffron card stock in my stash so I used that to add a little texture. I know I had used the Brick & Mortar 3D EF. The Alphabet Challenge Blog has "D" for Dry Embossing as their challenge. This fits the bill!

I stamped three daisies on mats of Whisper White and colored them with my watercolor pencils. On the middle image I stamped the "Why," from the Ornate Thanks set. I sponged the edges with Terracotta Tile Ink. I adhered a strip of the DSP to the brick and then adhered the images with liquid glue. Stamping Sensations has a flower challenge this month.

For the inside, I stamped sentiments from the Ornate Thanks and the flower from Ornate Style. I punched the three corners with my Detailed Trio Punch. The inks I used were Terracotta Tile and Crushed Curry.


I was inspired by the orange, yellow and greens in the photo inspiration at Just Us Girls #537.


Let me know if you have any questions and thanks for stopping by today.

Sunday, May 24, 2020

Stampin' Up! Butterfly Gala Easel Fold Friendship Card

Good Sunday morning, peeps! I have a bright, happy card for you today. I haven't done the easel fold in quite awhile so I decided today's the day. Here you go...

Card cuts you will need are listed below. 

I'm playing today at Just Add Ink #506 with their photo inspiration. My colors came out lighter than theirs AND my iPhone camera and natural lighting made them even lighter. Here's JAI's photo...


I love the colors in the photo, don't you? My design was inspired by the #41 Tic Tac Toe challenge at the Daisy Chain. I went straight across the bottom.

http://daisychainchallenge.blogspot.com/2020/05/challenge-41-tic-tac-toe.html

If you've never made an easel card before, this is how it looks from the side.


and this is what it looks like flat, ready to go into the envelope.

It's not quite flat in the photo so that's why you see the tips of one butterfly.

I colored the DSP from the Botanical Print Medley Kit with my Dark Pineapple Punch Stampin' Blends and adhered the pieces to the Whisper White card stock.

On a scrap of Whisper White, I stamped the flower from the Floral Essence Stamp Set, the sentiment and butterflies from the Butterfly Gala Stamp Set. I used Memento Tuxedo Black Ink for all of that.

I punched the sentiment out using the Story Label Punch and sponged around the edges with Pretty Peacock ink. I colored the flower with Pretty Peacock, Granny Apple Green and Pineapple Punch Blends. I punched the petals out with the Perennial Flower Punch. I colored the butterflies with the Blends and Watercolor Pencils, smoothing it out with a Blender Pen. I punched them out with the Butterfly Duet Punch.

The center of the flower is a self-adhesive Perennial Essence Floral Center. 

I added three different sized Pearls Basic Jewels.

For the inside I used sentiments from the Butterfly Gala Stamp Set and punched the corners with my Detailed Trio Punch.


I'm also playing again at Your Next Stamp Challenge #139 - Fun Fold.

If you have any questions, please leave them in a comment and I will answer as soon as I can.

Thank you for stopping by today.

Card Cuts:

Base - 4 1/4" x 11", scored and folded at 5 1/2"
Easel - 4 x 10 1/4, scored and folded at 2 1/2" x 5"
DSP - 3 3/4" x 5" and 2 1/4" x 3 3/4"
Inside Panel - 4" x 5 1/4"

Partial Product List:

Saturday, May 23, 2020

Stampin' Up! Magnolia Lane Concertina Fold Wedding Card

Having a great weekend? I certainly hope so. I can't believe it is Memorial weekend already. I'm grateful that we have a day every year to honor the men and women who died while serving in the U.S. Military. I wonder if there will be any parades this year? They will be long if they practice the 6' distancing!

I was inspired to create this card for the Double D Challenge Begins with "M". "M" is for Many Magnolias! I'm also entering it in Through The Craft Room Door: Anything Goes Challenge, at Craftyhazelnut's May Patterned Paper Challenge, and at Your Next Stamp Challenge #139 Fun Fold

I learned how to do this fold by watching Jan B. and reading Beccy Muir's tutorial. I don't have the needed supplies to finish the outside of my card so I'll show you the inside first.


Sorry about all the shadows...I wouldn't have been able to bring a light box with me even if I had one. It's on my wish list for Santa this Christmas!

This is one of the few pieces of Designer Series Paper that I had left in order to make this 5" x 6" card. Splitcoaststampers also has a tutorial for a Concertina Fold but it is nothing like this. However, theirs fits in an A2 envelope.

I fussy cut the flowers for the first and last panels and sponged the edges of my Whisper White rectangles with Mossy Meadow. I had to cut my photopolymer sentiment stamp in half because it was too long for the panel. I think I held my breath the whole time and almost passed out! It's from the Floral Essence Stamp Set and the lettering was quite tight and curvy.

On the sentiment panels, I stamped a flower from the February 2020 Paper Pumpkin kit in Basic Gray, stamped off once.

You will need a 10" x 6" piece of solid card stock. In my case I chose Thick Whisper White. You score and fold at 5".

The main piece of my Magnolia Lane Designer Series Paper is  12" x 6" The second piece, which is the reverse side of the first piece, measures 8" x 4". I would encourage you to pick a pattern that is not directional! Score the big piece on the long side at 2", 4", 6", 8" and 10". Score the smaller piece on the long side at 2", 4" and 6". The 4 rectangle panels measure 2 3/4" x 1 7/8".

So I've given you the easy part, now I'll let Jan B. take over. Beccy did hers a little differently with the process of folding, cutting and assembly but I did mine like Jan. Either one will end you up at the right place.

Here's how it looks from the top.


and here's how it looks laying "flat".


I'll be finishing the front similar to Jan's but it will be a wedding card. I'll also need to make an envelope for it.

I hope you'll give this a try as it is really fun to create. I'd love to be able to make one on a smaller scale to fit an A2 envelope but I'd need an engineering degree. Maybe my friend, Mary, will give it a whirl!

I just found another "new to me" challenge:
Use Your Stuff: #398 Patterns

Thank you for stopping by today and I hope you enjoyed my card.

Pammie's Inky Pinkies Challenge #2411

Welcome to another PIP Challenge . Here is what I created for it... I just love the background digital from our   awesome sponsor ... This w...