Saturday, October 31, 2020

Stampin' Up! Dragonfly Garden Birthday Card

Good Saturday morning, peeps. This is my last Saturday in NC and right now it's 36 degrees. It'll be a shock to go from the 50's highs  back to 100 degree heat index!

I used the upcoming Dragonfly Garden Stamp Set  (January - June 2021 Mini Catalog) and the current Best Year Stamp Set to create my card for today.

It's another monochromatic, which I love to create! I'll describe the inside first but you'll also see the outside along with it! 

I stamped a sentiment and images from Dragonfly Garden on the inside Purple Posy mat and adhered it with liquid glue. So, as you can see, this is a "Z" fold card. My card base is Whisper White Thick Card Stock.  Measurements are listed below.

Then I stamped a sentiment from Best Year in Highland Heather at the bottom of the remaining Purple Posy mat, which is a smaller size than the inner panel. I wrapped a piece of ribbon around it and secured it on the back, leaving enough to cut for making a faux bow. Then I attached that to the Highland Heather mat.

Using a 2 3/8" Stitched Shape die, I cut the Playing With Patterns DSP circle. I adhered that above the ribbon with liquid glue.

On a scrap of Whisper White, I stamped the dragonfly in Memento Tuxedo Black ink and colored it with my Light and Dark Highland Heather Blends. I punched it out with the upcoming Dragonflies punch and adhered it to the circle with Stampin' Dimensionals. 

Then I adhered that layer to the front of the card, only putting liquid glue on about 1" of the left side of the Z fold, making sure the panel hid the inside panel. 


Unfortunately, it won't lay flat so that I could show you that but I know you get it! I may add some bling. What do you think?

I finished off the envelope with a dragonfly on the front and more Playing With Patterns DSP on the flap.

I'm entering my card in the Aud Sentiments Challenge #263 - ATG with a sentiment and StampingPals Challenge #8 - Punches.

Thank you for stopping by today.

Measurements:

Card base: 5 1/2" x 8 1/2", score and fold at 4 1/4", score and fold at 2 1/8"

Purple Posy: 3 3/4" x 5" (inside liner); 3 1/2" x 4 3/4" art panel

Highland Heather: 3 3/4" x 5" mat for art panel

DSP: 2 1/2'" x 2 1/2"; 6" x 2 1/4" for envelope flap

Tricolor Ribbon: 9"

Partial Product List

Links by TheseAreMyStamps.com

Friday, October 30, 2020

Stampin' Up! Forever Fern Birthday Card

TGIF, peeps! This is my next to last Friday in the mountains. Five weeks have flown by like Hurricane Zeta that went through yesterday. We ended up not losing power but the outside fire pit chairs were blown helter-skelter and some of the corraled garbage pails were jostled.  There are lots of sticks and branches laying around but we are renters so we don't have to pick them up unless we want to. That was always my chore as a child and I absolutely hate it to this day! However, I do like to stamp and enter challenges! 

My inspiration came from Marcelyn Churchill on one of Beth McCullough's FB posts (Stamping Mom). I'm entering my card in one of the challenges where Beth is part of the Design Team...Festive Friday #FF0071 - World Kindness Day. You don't have to follow the theme; however, you do have to use at least three items from the Inspo List. I chose pattern paper, ribbon and sentiment.


I used the Forever Fern Stamp Set and Happiest of Birthdays to create my card for today.  It's another monochromatic for me in Just Jade colors. My card base is Whisper White Thick Card Stock. I stamped the front with the splatter stamp from Forever Fern. Then I adhered a piece of Flowers For Every Season DSP to a Just Jade mat. I adhered that to the card front with liquid glue.

Next on a piece of Whisper White Card Stock, I stamped the image and sentiment from Forever Fern. I tied a piece of ribbon from the Flowers for Every Season Combo Pack around the art panel and adhered it to the card front. It was supposed to have a mat underneath but I forgot that! I also wish I had adhered it with Dimensionals. I'll be making another one because I really like this design.

For the inside, I kept it simple with more splatters and a sentiment from Happiest of Birthdays.

Jeannie makes me smile and that's encouraging so I'm entering this card in her Dragonfly Journeys Challenge #139. Perhaps I'll save this for her birthday!

Thank you for stopping by today and I hope you have a great weekend planned. If you have time, stop by both of these challenges. You won't be disappointed!

Card Cuts:

Card Base: 5 1/2” x 8 1/2”, scored and folded at 4 1/4”

Just Jade mats: 2 1/4” x 4 1/4” and 2 1/4” x 4” (for forgotten art panel)

Whisper White Art Panel: 2” x 3 3/4”

DSP: 2” x 4 1/4”

Just Jade Ribbon: 9”

Partial Product List

Links by TheseAreMyStamps.com

Thursday, October 29, 2020

Stampin' Up! Game On Masculine Birthday Card for the Happy Inkin' Thursday Blog Hop


Welcome to the Happy Inkin' Thursday blog hop. You're in for a treat if you have never visited before. It's a weekly challenge and this week we have a sketch challenge. Here is what I created for it using the Game On Stamp Set.

Here is our sketch...

My card base is Crumb Cake Card Stock. I stamped the club from the Game On Stamp Set in Crumb Cake and Cherry Cobbler on the front of the card. 

The Plaid Tidings DSP is cut out with a die from Stitched So Sweetly Dies. The banner was cut with my trimmer and I notched it with Paper Snips. I stamped the club on that with Cherry Cobbler ink.

The sentiment is from Itty Bitty Greetings Stamp Set and is stamped in Garden Green. Why I didn't use Mossy Meadow to match the sentiment mat is beyond me! The sentiment and its mat are cut with the Stitched So Sweetly set. I adhered it with Stampin' Dimensionals.

I used stamps from the Game On Stamp Set for the inside of my card and front of my envelope. The envelope flap is more of the Plaid Tidings DSP.


and Krafty Chicks Challenge: KCC#531 Anything Goes 10 Year Party as well. This is their 10th birthday/anniversary and they are offering great prizes for the winning picks.

Thank you for stopping by today and I hope you enjoyed my card. Clicking on the "next" button will take you to Akiko. Clicking on the names below will take you directly to the other team members and their projects.


Partial Product List 

Links by TheseAreMyStamps.com

Wednesday, October 28, 2020

Stampin' Up! Dragonfly Garden Thank You Card

I have a sneak peek for you today of the Dragonfly Garden Stamp Set and Dandy Garden Designer Series Paper coming in the January-June 2021 Mini Catalog. Here’s my card ...


It was inspired by the sketch at Freshly Made Sketches #459 - A Sketch by Jen Brum 


My card base is Whisper White Thick Card Stock. I cut a panel of Neenah Bright White Card Stock, layed the DSP that I cut out with the Stitched Triangle Dies on it so I would know where to stamp my sentiment from the upcoming Dragonfly Garden Stamp Set. The ink I used is Mossy Meadow.

Then I embossed it with one of the EF's from the Greenery set. I adhered it to my card base with Stampin' Dimensionals. Then I adhered the two pieces of DSP to the embossed panel with liquid glue. The bow is made with the upcoming Braided Linen Mossy Meadow trim and is adhered with a glue dot. 

Et voila, card front done and now on to the inside...


 I used the tall flower stamp from Dragonfly Garden and colored parts of it with my Dark Daffodil Delight Stampin' Blends and my Old Olive Stampin' Write Marker. The sentiment is from the Many Mates Stamp Set. I adhered a strip of DSP to a panel of Neenah card stock and adhered that to the card base. Neenah's Bright White is a little off white and I only use it for panels.

The envelope is finished with another piece of the DSP and stamped on the front with insects from the Dragonfly Garden. I'm not sure if they're baby dragonflies or butterflies. In any event, I had to make some look like they were in flight. I'm sure you can see why!

Thank you for stopping by today and I hope you enjoyed my card. This is a great bundle that will be available in a few months. You need it, peeps!

Here's some product that is available now:


Tuesday, October 27, 2020

Stampin' Up! Brightly Gleaming Birthday Card

Good Tuesday morning, peeps! Can you believe there are only four more days in October and only 59 days until Christmas! Therefore, I brought out the Brightly Gleaming Specialty Designer Series Paper (Christmas themed) to create a not-so-much Christmas card. Yeppers, I'm calling it a masculine birthday card!


My card base is Whisper White Thick Card Stock with a mat of Night of Navy Card Stock.

My friend, LeAnne, introduced me to a new challenge yesterday so I ran a piece of Copper Foil through my embossing machine with the Hammered Metal 3D Embossing Folder (because I thought that looked kind of rhombusy or trapezoidy!). Therefore, I can now officially play at Let's Squash It! It's Gail and Jo's first challenge so I hope you'll pay them a visit.


Then I cut three mats of Night of Navy and three Brightly Gleaming rectangles (definitely geometric!) to center on my card to fulfill the challenge at The Paper Players PP514 Sketch by Jaydee. My inspiration came from Ann Marie Hile.


I stamped the sentiment from Happiest of Days on a scrap of Whisper White using Night of Navy ink. I cut it out with a die from Tasteful Labels Dies. I used the same die to cut out a Night of Navy mat, which I cut in half and glued to the back of the sentiment. I used a copper Star Designer Element for the point of the exclamation! I adhered the sentiment with Stampin Dimensionals.

I adhered another piece of Night of Navy to the card base. I used another sentiment from the Happiest of Birthdays Stamp set stamped on a Whisper White panel in Night of Navy.


I love making masculine cards and I'm happy that Make My Monday Challenge #184 is a masculine theme chosen by Wei.

Thank you for stopping by today and I hope you'll visit tomorrow.

Card Cuts:

Base: 5 1/2" x 8 1/2", score and fold at 4 1/4"
Night Of Navy Mat: 5 1/4" x 4" (2); 1 3/8" x 2 3/8" (3); scrap 3" x 1 1/2"
Copper Foil: 5 1/8" x 3 7/8"
DSP: 1 1/4" x 2 1/4" (3)
Whisper White: 5" x 3 3/4"; 3" x 1 1/2"


Partial Product List

Links by TheseAreMyStamps.com

Monday, October 26, 2020

Stampin' Up! Daisy Lane Friendship Card

Welcome back to Monday Morning's Mystery card. This wasn't too much of a mystery for me as I made it here and here! However, I forgot to use one piece of the equation and changed it up a little...


I'm happy with my mistake. Let me tell you about the ingredients and measurements...

Grapefruit Grove Card Stock (retired Clearance Rack!) 5 1/2" x 8 1/2", scored and folded at 4 1/4"
Coastal Cabana Card Stock mat 3" x  3 3 /4"; 2 1/2" x 2 1/2" 
Playing with Patterns DSP 3" x 3 1/2"  (on sale for $9.58)
Whisper White Card Stock Art Panel 3" x 3"; 4" x 5 1/4" (inner liner); scrap for daisy punch; scrap for inside
Ribbon 7" - Coastal Cabana from Playing with Patterns Combo Pack
Daisy Lane Stamp Set (daisy, daisies for background, and inside sentiment)
Grace's Garden Stamp Set (hello sentiment)

Now for the "whodunit"...

The Grapefruit Grove card base took one of the daisies from Daisy Lane and stamped itself all over the front with Flirty Flamingo ink!

Then, the Coastal Cabana mat adhered itself, offset, on the card front. Next the DSP got in on the action and adhered itself to the Coastal Cabana, again offset.

Along comes the Whisper White square and stamps from Daisy Lane and Grace's Garden...they hop on board in a dignified manor with Flirty Flamingo ink. 

Not to be outdone, the Medium Daisy punch punches out the Flirty Flamingo double stamped daisies and they get adhered to each other with a glue dot. Then lo and behold, the ribbon makes itself into a loop and adheres itself to the back of the daisy with a glue dot. Then guess what happens?

Yes, you guessed it...the ribbon/daisy adheres itself to the art piece with two full sized Stampin' Dimensionals! You are such sleuths! Along comes the spy glass, a/k/a the rhinestone and it sticks itself to one of the daisies and calls it "mystery solved". 

So the 2 1/2" x 2 1/2" Coastal Cabana piece ended up on the inside...


I didn't like the severeness of the square Coastal Cabana and I hadn't brought any punches to do the corners so another mystery is, what did I use? Leave a comment with your guess!

The scrap piece of Whisper White said, "Don't leave me behind in the dust of your mistakes" so it endeared itself to one of the Ornate Frames Dies, Daisy Lane sentiments and liquid glue.

"Nobody puts baby in the corner", but another stamp from Grace's Garden wanted to do that. If you feel like putting the name of the movie in a comment, feel free! A little bit of Coastal Cabana Watercolor Pencil and Blender pen finished that.

Edie used Blueberry Bushel card stock, Soft Sea Foam card stock, matching inks, Garden Impressions DSP (retired) and the Perfectly Framed Stamp Set (retired) which coordinated with the Ornate Frames Dies (current) to create her card. It's funny that she and I used the same die.


I love her card! That was one DSP I didn't get and wish I had. However, I did get samples through a "share". If you ever have an opportunity to do a share, don't be shy! My team has a lot of them when the time comes. Here's how her inside was done...

Meg really put her own spin on the clues! I LOVE it! She used the Snow Wonder Stamp Set and the matching Snow Time Dies to make her card. Her colors are Just Jade and Cinnamon Cider.


Nancy used the Forever Fern Stamp Set for her sentiment, Misty Moonlight for her color and some product from the Boho Product Medley.

I'm entering my card in these challenges:


Thank you for visiting today and I hope I brought a smile to your face.


Sunday, October 25, 2020

Good Sunday morning, peeps. Unfortunately, I have no card for you today but I do have another photo of my helper and some pics of our excursion to Helton Falls. I thought I was videoing our voyage in and out of the one lane mountain road but, alas, I forgot to press the red button. It was quite a ride. My son wants to do it again and hike the falls. Me, not so much!


This is the table where I did some crafting and photo shoots the last time we were here. Chester says he has squatter's rights this time around!


This was a double falls and there were no rails on the path, but lots of tree roots so it wasn't smooth. I am not as agile as I used to be so I skipped the hike about 500' into it!

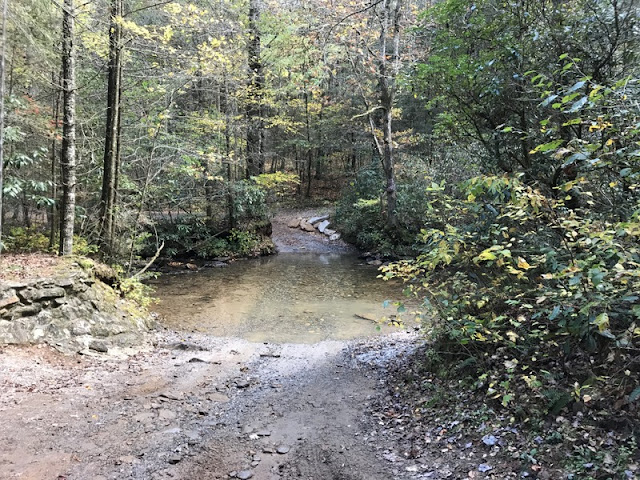
On the way back down the mountain, we had to cross two spots where the fall waters ended up. One was about 6" deep and the other 12". The underbody of the truck got a wash! The first is the less deep one. 


The other was supposedly to be a video. But my son got a picture of it before he drove through.


The long and winding road where we only met another vehicle coming the opposite way. No guard rails and sheer drop off down the mountain...eek!


Thanks for stopping by today and tomorrow I hope to be back with mystery cards.


Pammie's Inky Pinkies Challenge #2411

Welcome to another PIP Challenge . Here is what I created for it... I just love the background digital from our   awesome sponsor ... This w...