Welcome to Fun Fold Friday. Did you notice my post title? I'm on the Design Team for Creative Creases!! It was fun being a Guest Designer for June and July but this is an even better gig! Woo hoo!! Here's my first card as part of Debbie's (a/k/a The Secret Stamper) Design Team.

Thank you, Debbie, for such an honor! So, my peeps, put on your finest Fun Fold hat, come along and play with us! Just click on the logo and you'll be transported!
Oh, and not only play with us, but play with Double Trouble as we are partnering with them from August 4th - August 14th. Below is a summary of their challenges but you are required to only play with Thing 1 who is asking for “Gimme S’More,” which means using more of something – more layers, more colors, more images, etc. Of course, you know I would like you to play with all three! I'm setting a good example by doing just that with my card!

My team mate, Karen Ksenzakovic, was my inspiration for the fold I chose to create. Here are the deets for my card...
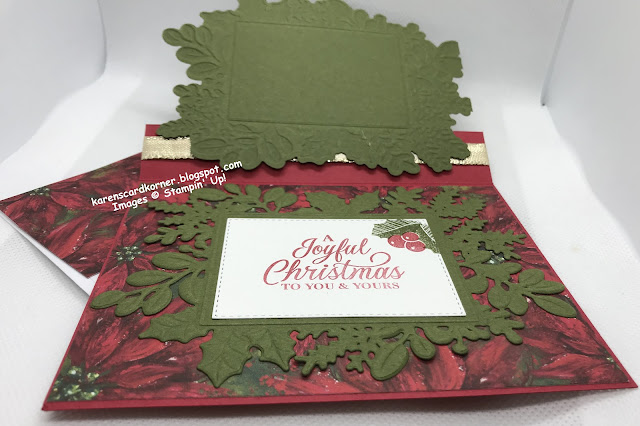
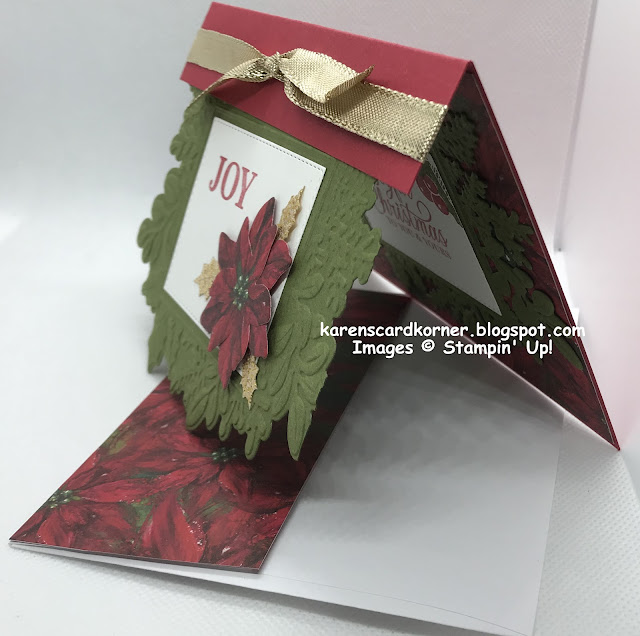
Now back to the front...I took two dies from the set and ran them through my die cutting machine picking out a portion of the Boughs of Holly DSP that I thought looked good. I adhered them together with liquid glue and attached it to the sentiment frame with a dimensional. I dotted the gold leaves with liquid glue and slid them under the poinsettia. As you can see, the card can stand on its own.

So, to see if you were paying attention, some of my product is new and some is old. Let's see if ABC Christmas Challenge "N" is for new, "O" is for old caught that!
- Real Red Cardstock Card Base: 5 1/2" x 5 1/4", scored and folded at 4 1/4"
- Mossy Meadow Cardstock: 5 1/4" x 4" (2) for outer and inner parts
- Basic White Cardstock: 3 1/2" X 2 1/2" (2) for sentiment panels
- Boughs of Holly Designer Series Paper: 5 15/16" x 4 1/16" for inner liner; scrap to die cut poinsettias for front; 6" x 2 1/4" for envelope flap (new in the July/Dec 2022 mini catalog)
- 3/8" Gold Shimmer Ribbon: 16"
- Gold Holly Leaves: 3
- Inks: Real Red and Mossy Meadow
- Merriest Moments Photopolymer Stamp Set (old from a previous catalog but carried over!)
- Merriest Frames Hybrid Embossing Folder
- Merriest Frames Dies
- Adhesives: Tear & Tape, Liquid Glue, Stampin' Dimensionals
I refreshed my memory on how to use the Merriest Moments EF and Dies and I'm so glad I did as I would have probably ruined my dies and possibly my cutting machine.
I ran one piece of Mossy Meadow through my machine with the outline die that fits nicely into the embossing folder. That became my front piece.
Then I ran the second piece of Mossy Meadow through my machine with the EF only. Next I ran that embossed piece through my machine with the die that is detailed.
I adhered the DSP to the inner part of the card with liquid glue.
I stamped the sentiments on the two Basic White cardstock pieces in Real Red ink. For the inner sentiment, I stamped two holly leaves in Mossy Meadow and the berries in Real Red. I cut the frames out with another die from the set and adhered them with liquid glue.
Next I ran the ribbon around the cut flap and tied a knot. On the back side, I adhered two strips of Tear & Tape making sure the Mossy Green frame fit perfectly together with the other one (that is not adhered yet!)...also making sure there was no tape in the nooks and crannies that would adhere to the inside of the card! Once my front piece was adhered in place, I lined up the inside piece, face down, with the matching front (back part), put liquid glue on it and closed the back of the card down on it. That insured everything was still lined up. I wish I could do a video but alas I have no equipment and no talent for technology!


I decorated the envelope flap and called it a done day! I'm entering my card and envelope in the Christmas Craft Creations July Challenge - Patterned Paper.
So, to see if you were paying attention, some of my product is new and some is old. Let's see if ABC Christmas Challenge "N" is for new, "O" is for old caught that!
I hope you enjoyed my card today and I also hope you'll become a follower and subscribe via email so you will know when I post. Any questions, fire away! Until we meet again, may all go well with you.


Congrats on your new design team gig! This is certainly a gorgeous Christmas card...you've created a beautiful "fun fold" for sure!
ReplyDeleteThank you so much, LeAnne.
DeleteSuch a lovely holiday card, Karen! "S'More" layers and a fun fold, too! Congratulations on you new DT role at Creative Creases... I'm sure you will have lots of fun. We love partnering with Debbie! Thank you for sharing your card and talents with us at Double Trouble for our "S'More" challenge!!! -Donna
ReplyDeleteThank you, Donna. I love to share with DT!
DeleteThis is such a pretty holiday card, Karen. I like your take on the fun fold, Lucky you in your new role at Creative Creases, too! Thank you for playing along with us at Double Trouble #117.
ReplyDeleteThank you so much, Melanie.
DeleteWow, Karen, what a beautiful Christmas fun fold and congratulations on becoming a Design Team member of Creative Creases. You certainly will be an asset to Debbie's fun fold challenge and thank you for sharing S'more challenge with us at Double Trouble.
ReplyDeleteThank you so much, Suzanne. I appreciate your comment.
DeleteCongratulations on your DT honors!! How exciting! With beautiful creations like this, I can see why. This is such a beautiful and fun card. Thank you for sharing it and playing along with ABC Christmas Challenge ~ Wendy
ReplyDeleteThank you so much, Wendy. I appreciate your comment on behalf of ABC.
DeleteHow very pretty!! I love the dry embossed green foliage! What a fun fold too. Thanks for sharing this with us at Double Trouble :)
ReplyDeleteThank you, Kellianne, for commenting on behalf of DT.
Delete