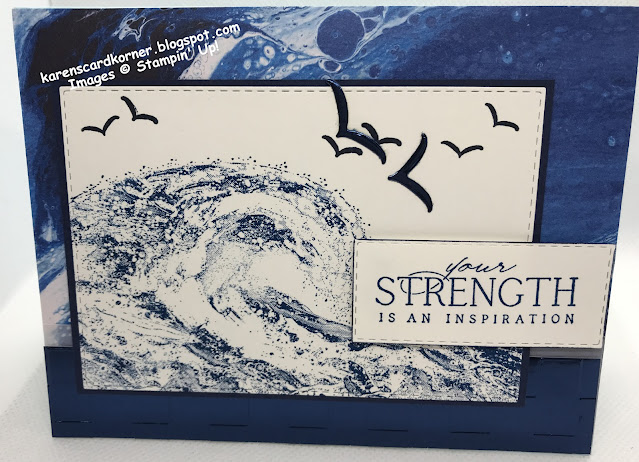
Good morning! My card today is not only an inspirational card, it was inspired by my upline, Amy Koenders. It's another card that I did kits for my ladies way over a week ago.
- Card base: 5 ½” x 8 ½”, scored and folded at 4 ¼”
- Night of Navy mat: 3 1/8”
x 4 ½”
- Basic White inner liner:
4” x 5 ¼”; scrap for cutting out image panel and sentiment
- Waves of the Ocean DSP: 4
¼” x 5 ½” panel; ¾” x 5 ¼” strip for inside
- Blue Foils Specialty
Paper: 1” x 5 ½” strip; scrap for birds
- Vellum: 1 ¼” x 5 ½” strip
Tools:
- Waves of Inspiration Stamps (wave); (birds & sentiments)
- Waves Dies (birds)
- Pacific Point & Night of Navy inks,
- Checks Embossing Folder
- Stitched Rectangles Dies
- Rhinestone Waves Basic Jewels
- Adhesives
Assembling:
Adhere the 4-1/4” x 5-1/2” panel
of DSP to the front of the card base with liquid glue.
Adhere the 1-1/4” x 5-1/2” strip
of Vellum to the card front with adhesive runner (put the adhesive at the
bottom of the strip, not at top).
Emboss the 1” ‘x 5-1/2” panel of
Blue Foils Specialty Paper with the Checks Embossing Folder. Adhere the foil to
the card front with adhesive runner.
Stamp the wave image in Pacific
Point ink on the scrap of Basic White. Stamp the bird images in Night of Navy
ink above the wave.
Cut two Blue Foil birds.
Cut around the wave image with
the third largest rectangle die from the Stitched Rectangle Dies.
Adhere the die cut rectangle to
the Night of Navy panel.
Adhere layered panel to the card
front
Stamp the sentiment in Pacific
Point ink on a scrap of Basic White and cut it out with the smallest of the
wide rectangle dies
Adhere the sentiment with
Dimensionals to the card front.
Adhere the two foil birds to art
panel.
Stamp sentiment on inside Basic
White panel.
Glue strip at bottom and add embellishments.
1.
For the inside:
Stamp sentiment on inside Basic White panel. Glue strip at bottom and add embellishments.


Your card turned out great! Love the colors! :)
ReplyDeleteThank you so much, Amy.
DeleteThis is just lovely, Karen - love this set! :)
ReplyDelete