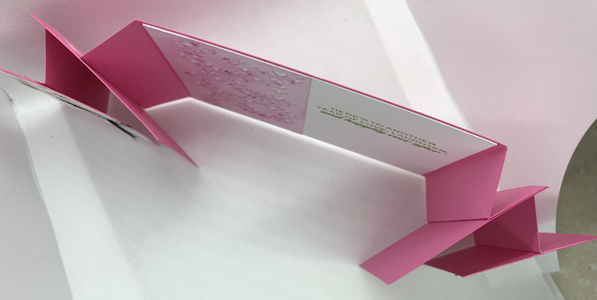
Oh my!! I’m so thrilled, and still can’t believe it: I’ve been asked to be Guest Designer for Debbie Mageed (Secrets to Stamping) at her June Creative Creases Challenge – Anything with a Fun Fold. This one is challenge #34. If you have come from her site, welcome. If you are here first, I hope you'll hop over to her post here. I have chosen to use a fun fold that I saw Heidi Smith create. She got her idea from Susan Canfield. I love that demonstrators are so willing to let others CASE their cards. Susan called it a “Freestanding Floating Panel” card. I did several mock-ups before I made my actual card. I suggest you cut all your pieces at once and do a run through with temporary adhesive! Let’s take a look at my first attempt. You’ll be seeing the good, the bad, and the “ugh”ly!!
Card Cuts and Instructions:
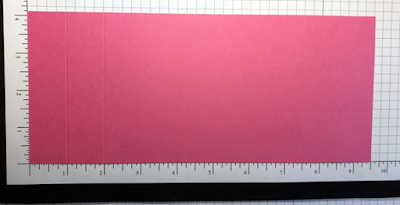
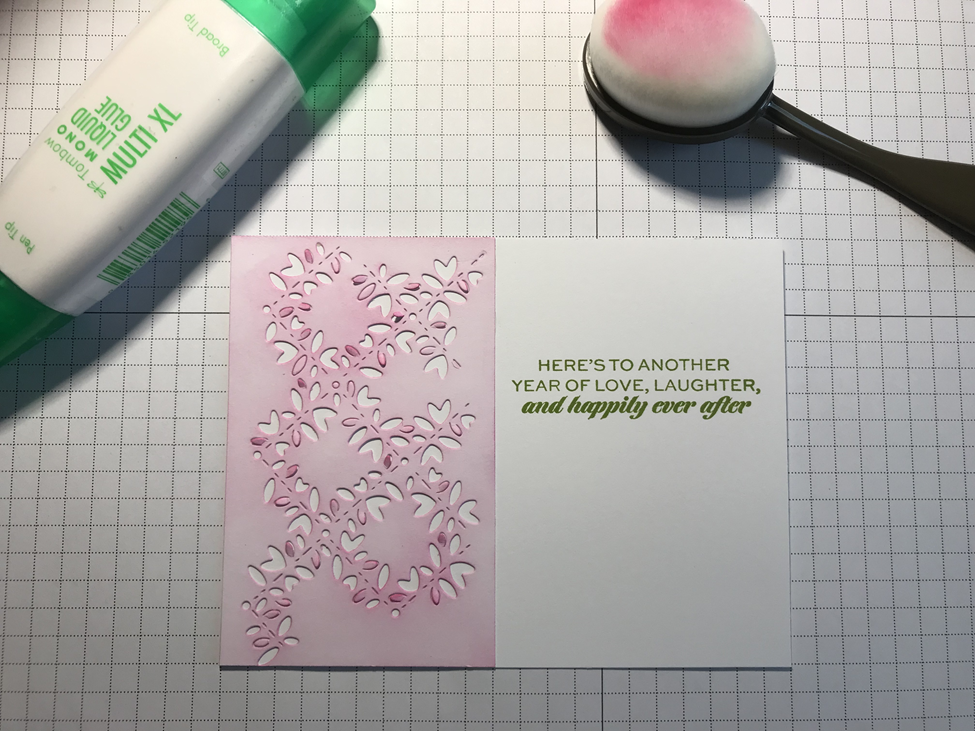
Solid Cardstock Base (Polished Pink): 9 ½” x 4 1/8”; score on long side at 1”, 2”, 7 ½”, 8 ½”
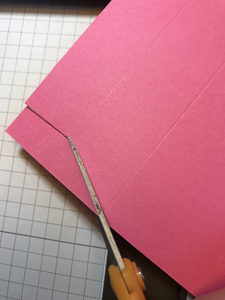
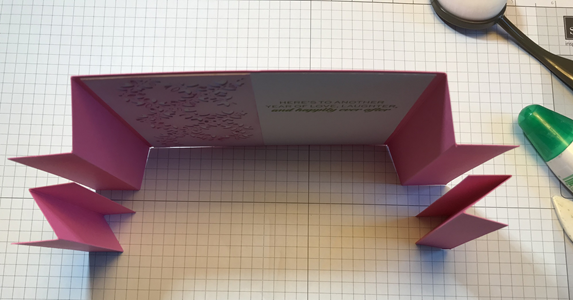
Cut ½” in to the first score line Snip diagonally to the second score line on each edge of the card top
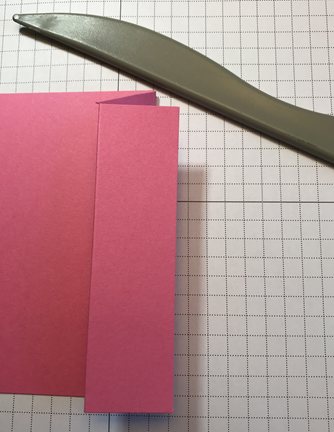
Fold into card at 2” score and at the 1” score back on itself and burnish
Repe Repeat for the other edge. You should end up with this
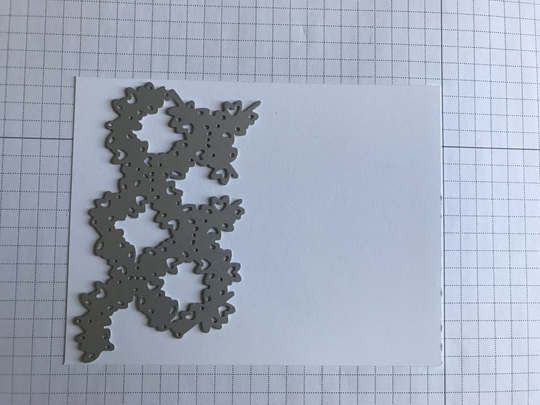
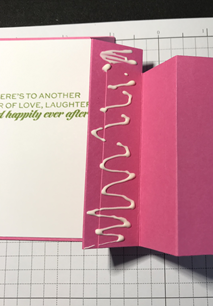
Basic White Inner Liner: 4” x 5 ¼”; run through die cutting/embossing machine with die from the Blossoming Happiness Dies
Stamp sentiment of your choice. My “Here’s to another year…” is a stamp from the Love & Happiness Stamp Set stamped in Granny Apple Green. This is where the “ugh”ly came in. I had stamped it on the die cut panel and had a halo. I did not want to run another panel through the die cutting machine so I chopped that piece off, stamped a new piece of Basic White, sponged the die cut part and adhered it to the new panel. Then I adhered it to the inside of the card. Where there's a will, there's a way!
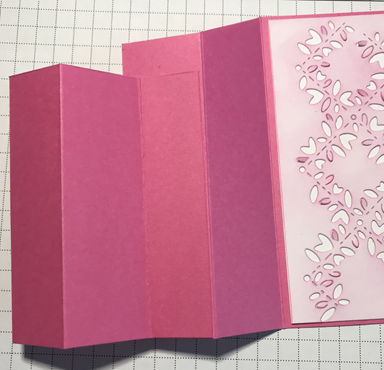
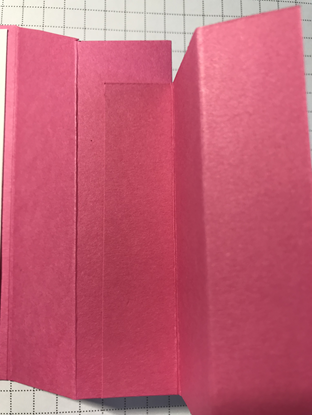
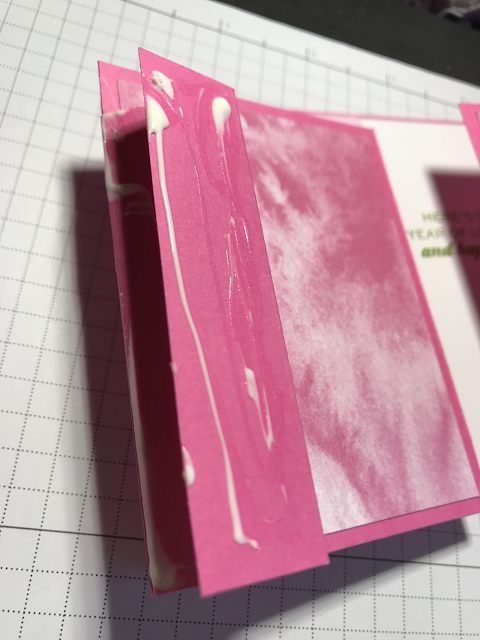
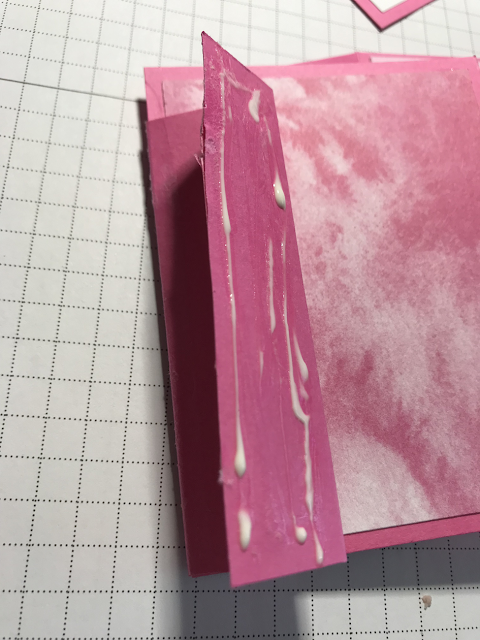
Solid Cardstock Mechanism for attaching to floating panels: 2 ½” x 3 1/8” (2); score on short side at ¾” and 1 ¾”; fold and burnish to make a “Z” shape.
Adhere to outer base fold. Z form must go opposite way for each side and be lined up with outer edge of base fold. If you line it up with the inner fold, your pieces won’t fit properly. Don’t do this! I repeat, DON’T do this…
Do this!!The pictures show each side of the card, wrong and right, left and right…lol!
Designer Series Paper for the Large Floating Panel (New Horizons DSP): 2 ½” x 3 3/8” (2); adhere to Large Floating Panels with liquid glue. (No photo)
Next you’ll adhere the large panels to the Z folds.
You can see the “ugh”ly
here from removing the incorrectly placed Z fold. BUT it didn’t matter because
the large floating panel covered it!
Solid Cardstock Small Floating Panel: 2 ¼” x 3 1/8” (2)
Basic White Mat for Small Floating Panel: 2” x 2 7/8” (2);
adhere to Small Floating Panel. Here comes some more “ugh”ly…brace yourselves!
Adhere
the small floating panel to the front of the Z fold but don’t do this...
Do just
the front flap of the mechanism…don’t put glue on the inside edge!
Number one, I had too much glue on the flap AND I put glue
on the edge in back of it. You do want the small floating panel to come all the
way out to the mechanism edge to hide the mechanism though. I removed the glue
with cornstarch and a glue eraser. What a mess! “Ugh”ly!!
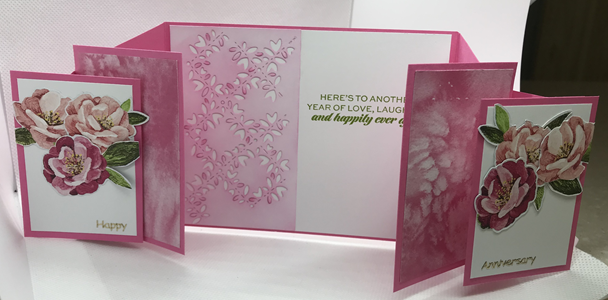
Fussy
cut flowers and leaves from the Hues of Happiness Designer Series Paper (There
is a pattern that you can use the coordinating dies. You’ll see that for my
final card.)
Arrange according to your preference and adhere to Basic White
with liquid glue. You should end up with this...
I
added the “Happy Anniversary” with Peel Off Stickers that I bought at a craft
store and wrapped a length of Gold Simply
Elegant Trim around the card and tied a bow.
Thank you for stopping by today and I hope you have a great weekend. Please come back on Monday for more M & M's!


WOW!
ReplyDeleteSo pleased to see your entry here at Creations in Pink.
This is a lovely project.
Thanks for sharing.
Jackie DT @ Creations in Pink
Thank you, Jackie, for your comment on behalf of CIP.
DeleteIt is a gorgeous card! Thank you for joining our challenges at Colorful Options and Four Seasons!
ReplyDeleteDiane CO DT and FS DT {Nellies Nest}
{Colorful Options}
Thanks much, Diane, for commenting on behalf of CO and FS!
DeleteLovely card.
ReplyDeleteThank you, Dani!
DeleteCongrats on your GD gig! You ARE the queen of fun folds, after all, very well-deserved! These are beautiful cards...might give one a go if I get time! TFS the directions!
ReplyDeleteIt looks like it's bigger than the medium SU
ReplyDeleteenvelopes - correct?
It fits in an A2 card and weighs less than an ounce. It does not exceed extra postage as far as I can tell.
DeleteOh, Karen, this fun fold is so cool! I really love the multiple layers, giving you so much space for pretty details. I can't thank you enough for being my Guest Designer while my craft room is all in boxes! You have given me lots of inspiration for my future craft room. Have a great weekend!
ReplyDeleteThank you, Debbie. It truly a challenge. You are most kind with your comment.
DeleteI love you card! I'm going to give it a try. Thanks for sharing.
ReplyDeleteThank you. I wish I knew who you are so I could see your card!
DeleteCongratulations on your guest spot. Your cards are just beautiful. The folds are great. Thank you for joining us at The Four Seasons Challenge. Bunny - designer for The Four Seasons Challenge
ReplyDeleteThank you so much, Bunny, for commenting on behalf of Four Seasons.
DeleteWow! That's a very fancy fancy-fold!! Love the colors, such a pretty design! :)
ReplyDeleteThank you, Amy.
DeleteCongratulations on your Guest Designer spot!! And I love this card - and the fold!! TFS the instructions with us! :)
ReplyDeleteThanks much, Mary.
DeleteWow, what a great fun fold! Thanks for all the picture directions!
ReplyDeleteThank you, Susan.
DeleteWhat an amazing card, Karen!! Congrats! :)
ReplyDeleteThank you so much, Beth.
DeleteI love the design of your card and those flowers are lovely! Thanks for joining us at The Four Seasons Challenge!
ReplyDeleteThank you, Glenda, for your comment on behalf of Four Seasons.
DeleteLove your card and wish you would do a video on You Tube. Perfect card for this stamp and die set. A must have.
ReplyDeleteThank you but I don't have video equipment. One of my teammates is going to do one I think.
DeleteThis is so pretty and super creative. Thanks for sharing it with us at THe Four Seasons Challenge Blog and please visit again soon.
ReplyDeleteThank you, Karen, for commenting on behalf of TFSC
DeleteWOW! These are just GORGEOUS! Thanks so much for playing in our challenge at Colorful Options!
ReplyDeleteDarlene
COLORFUL OPTIONS CHALLENGE
DAR’S CRAFTY CREATIONS
Thank you so much, Dar.
DeleteHi Karen. My name is Pam Love. I also live in Ft. Myers, and I love making cards. Just curious Karen, do you give classes in the area? Your work is so beautiful. I’m hoping you share your talent.
ReplyDeleteThank you, Pam. I'll be in touch via email about classes.
Delete